tutorial · 2026-03-13
Auto-Texturing a UE5 Landscape by Height and Slope (and Fixing the Black Landscape)
Why a freshly applied auto-material paints your terrain solid black - and the exact Paint-tab steps that turn it into snow caps, cliffs and ground in seconds.
What an auto-material actually does
Hand-painting a large Unreal landscape is slow, error-prone work. You can spend an afternoon brushing snow onto the right peaks and cliff rock onto the right faces, only to re-sculpt one ridge and have to redo all of it. An auto-material removes that drudgery by deciding the texture for each part of the terrain from two pieces of information the landscape already knows about itself: how high a point is, and how steep it is.
The logic is simple to reason about. High and flat reads as snow. Steep, regardless of height, reads as exposed cliff rock. Mid elevations grade from a higher band to a lower band, and everything below that is ground. Because the material samples world height and surface incline at runtime, the texturing follows the terrain automatically - re-sculpt a mountain and the snow line moves with it, no repainting required.
If you want auto material landscape height slope behaviour in Unreal without wiring the whole material graph yourself, the Massive Open World Landscape Pack ships a ready-made 'AutoMaterial' that does exactly this. It auto-paints by configurable height and incline rules and exposes the thresholds and textures so you can tune them. The rest of this tutorial uses that material as the worked example, but the workflow - assign, extract layers, fill, then tune in the instance - is the same for any height/slope auto-material.
Assign the material - and why the landscape turns black
Start from a landscape that already exists. In the Massive Open World Landscape Pack the fastest route is to import one of the supplied 16-bit grayscale heightmaps: open the Landscape panel, switch to the Manage tab, choose to create a new landscape From File, and pick a heightmap. Smaller sizes such as 1K (1009x1009) suit a sub-region; the 8K heightmap (8129x8129) is for a full open-world continent. The pack provides 14 maps at four sizes each, so you can mix tile sizes across a World Partition world.
With the landscape selected, find the Landscape Material slot in the details panel and assign the auto-material - the pack's material instance 'MI_AutoLandscape_Inst' built on the master material 'M_AutoLandscape'. Always assign the instance, not the master, so your edits stay non-destructive.
The moment you assign it, the landscape almost certainly turns solid black. This is the single most common point where people assume something is broken, delete the material, and start over. Do not. A black landscape after applying the AutoMaterial is expected and normal. The material is built around named weight-blended layers, and at this stage none of those layers carries any weight yet - every layer is at zero, so the material has nothing to display and falls back to black.
In other words, the texturing exists; you simply have not told the landscape which parts of itself belong to which layer. That is what the next two steps do.
Create Layers from Assigned Material
Switch the Landscape tool to the Paint tab. With a layered landscape material assigned, Unreal can read the layer definitions straight out of the material and generate matching paint targets for you, rather than making you create each layer info asset by hand.
1. With the landscape selected and the Landscape tool open, click the Paint tab.
2. Click 'Create Layers from Assigned Material'. Unreal scans the assigned auto-material and extracts a paint target for each named layer it declares.
3. Confirm the target layers now appear in the Layers list. For this pack you should see the structural layers the AutoMaterial defines - an 'AutoMaterial Base Layer' alongside Snow, Cliff, Mid-High, Mid-Low and Ground, plus the five custom layers reserved for hand-painting your own textures on top.
These extracted entries are landscape LayerInfo paint targets. They are the surface you paint onto - not the place you edit textures or thresholds. Keep that distinction in mind; it matters in the final step. The landscape is still black at this point because the layers exist but none has been filled with weight yet.
Fill Layer on the base layer to paint by height
The base layer is what makes the auto-material auto. Once it carries full weight across the whole landscape, the material's internal height and slope logic takes over and decides, per pixel, whether that spot reads as snow, cliff, mid-high, mid-low or ground. You do not paint those bands by hand - you fill the single base layer and let the material distribute the rest.
1. In the Paint tab's Layers list, locate 'AutoMaterial Base Layer'.
2. Right-click it and choose 'Fill Layer'. This assigns full weight for that layer across the entire landscape in one operation.
3. Watch the landscape resolve from black into a fully textured terrain - snow on the high flats, rock on the steep faces, and graded ground below - all driven by the height and slope rules baked into the material.
If the result still looks wrong - flat-coloured, or banded in the wrong places - the usual cause is filling the wrong layer or skipping the 'Create Layers from Assigned Material' step, so the base target was never created. Re-run the extraction, then fill only the base layer. The remaining named layers (Snow, Cliff and so on) are driven by the material, and the five custom layers are there for you to brush in manually wherever you want art that overrides the automatic result - a worn dirt path, a specific patch of moss.
Swapping textures in the Material Instance
Now make it yours. The mistake to avoid here is editing the extracted paint layers directly - those are weight targets, not where the look lives. All texture and rule changes happen in the Material Instance, 'MI_AutoLandscape_Inst'. Open it and you get exposed parameters per tier: the base colour and normal map for each band, plus the height and slope intensity values that move the snow line and decide how steep a face has to be before it shows cliff rock.
Swap a tier's base colour and normal texture to retexture that band everywhere it appears - change the Snow tier's albedo and the whole snow line updates at once, no repainting. The pack bundles tiling colour and normal textures for grass, gravel, rock (basalt and sandstone) and snow to get you started, and the demo levels also reference UE starter-content textures specifically so you can see what to replace with your own art. Only basic textures ship with the pack; it is built on the assumption that you bring your own.
To move the bands themselves rather than retexture them, adjust the height and slope intensity parameters in the instance. Raising the snow height threshold pushes snow up the peaks; lowering the slope angle that triggers cliff makes more of the terrain read as exposed rock. Under the hood the material is assembled from functions including a snow mask, puddles, colour variation, tiling variation and an RVT blend, with Runtime Virtual Texture height and colour assets, but you do not need to open the graph to use it - the instance parameters are the intended control surface.
One rule to keep: do not edit the extracted layers to change the look. Edit the Material Instance, and if you change the material's layer structure, simply re-run 'Create Layers from Assigned Material' to regenerate the paint targets and fill the base layer again.
Sculpting the terrain you auto-texture
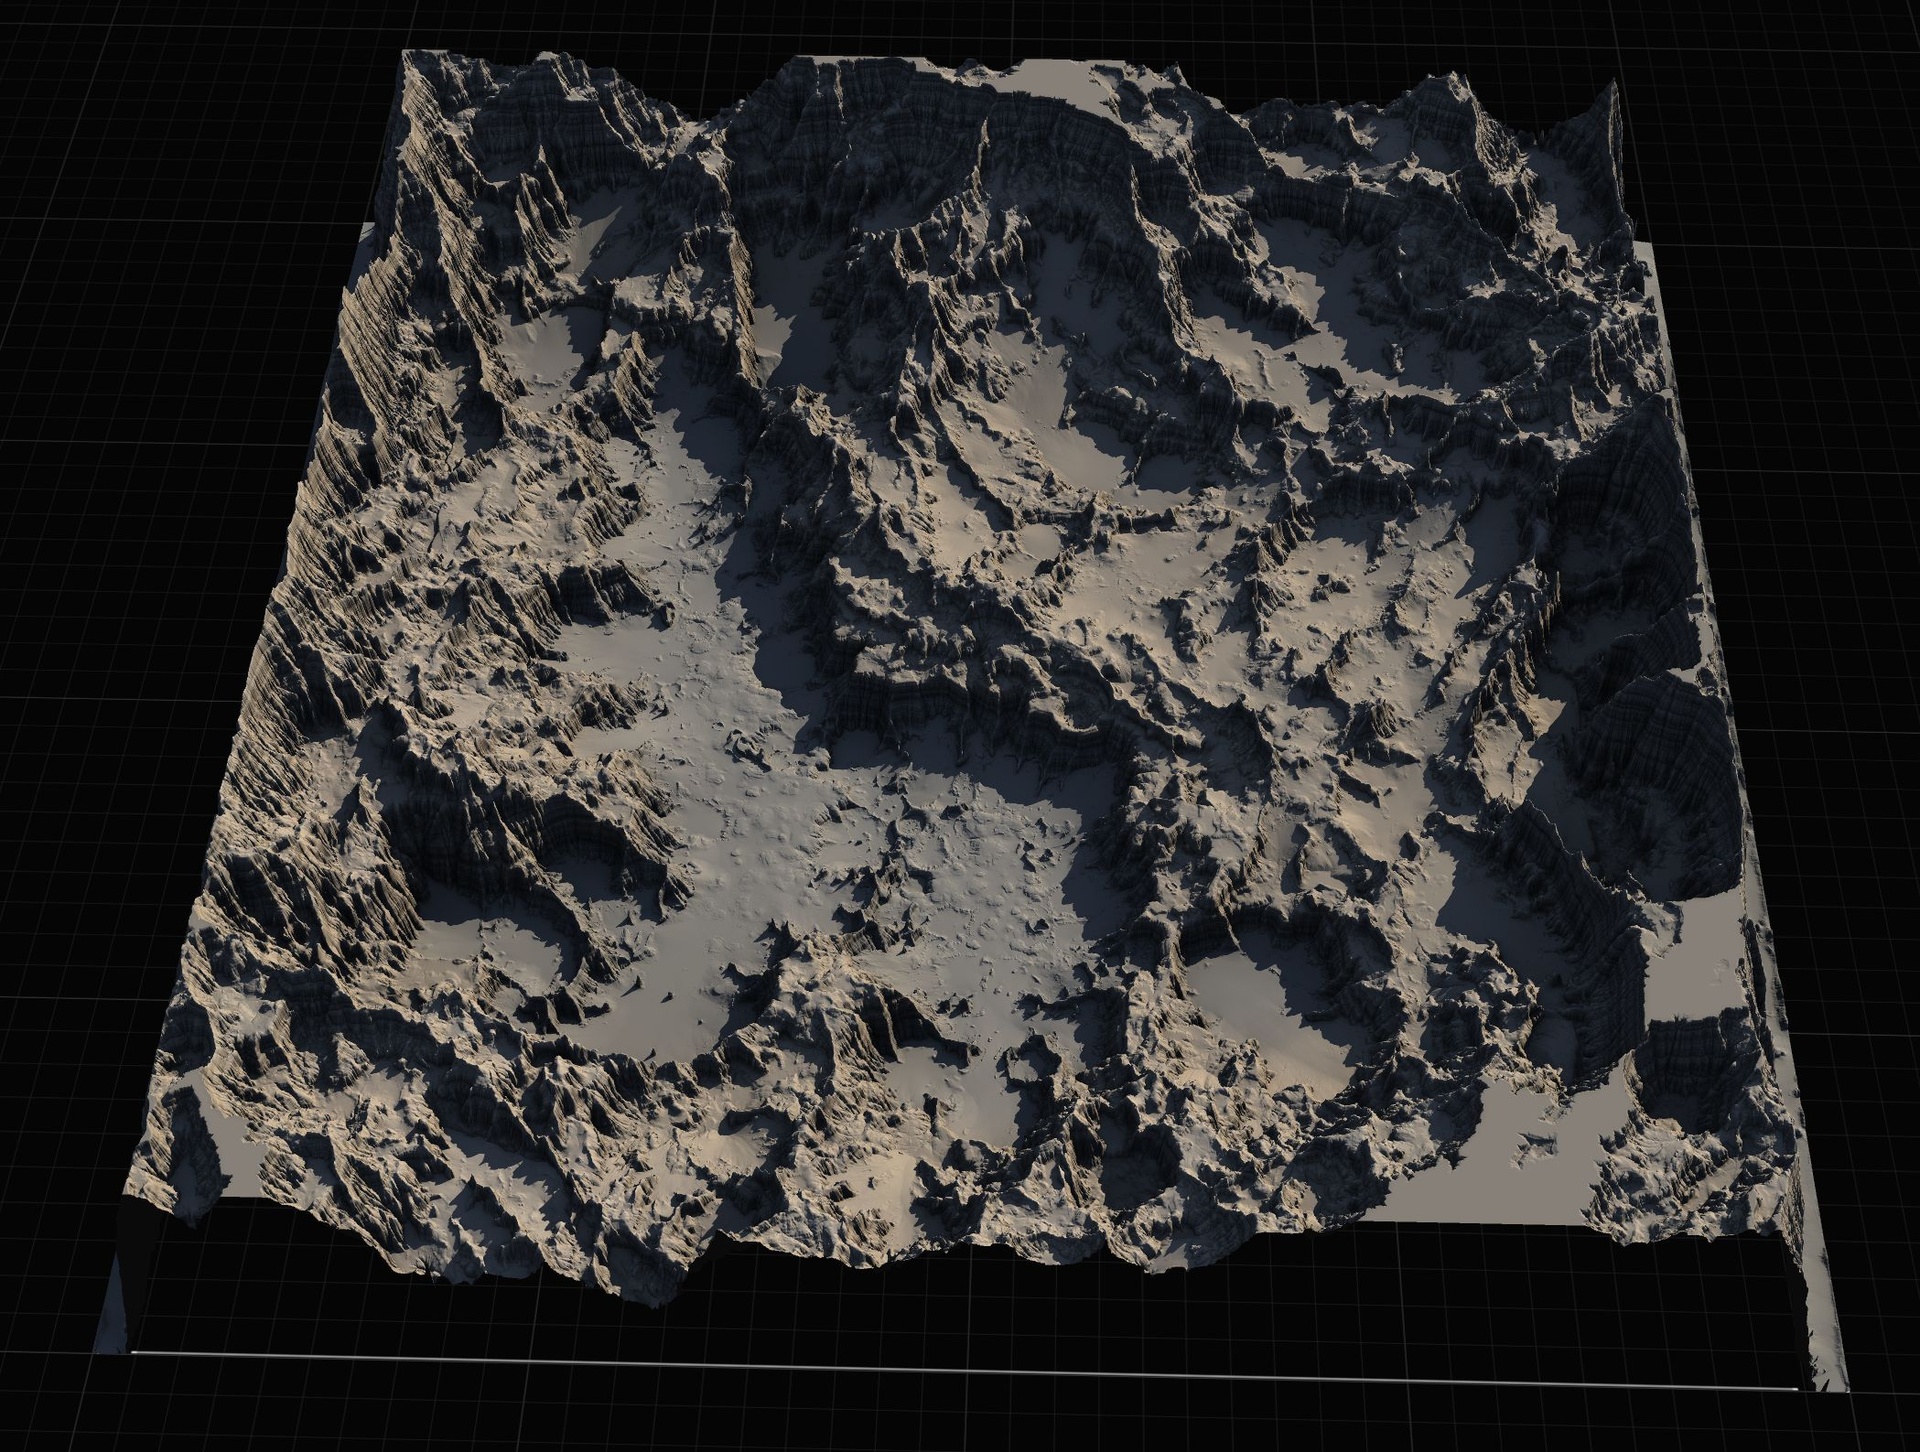
Auto-texturing solves the painting problem, but it assumes you already have terrain worth painting. The Massive Open World Landscape Pack covers that with 14 ready-made open-world heightmaps - islands, highlands, mountain passes and volcanic terrain - each importable at 1K, 2K, 4K or 8K, plus a Gaea source file per map so you can re-edit the shape and re-import. That is the fastest path: import a finished continent, assign the AutoMaterial, fill the base layer, done.
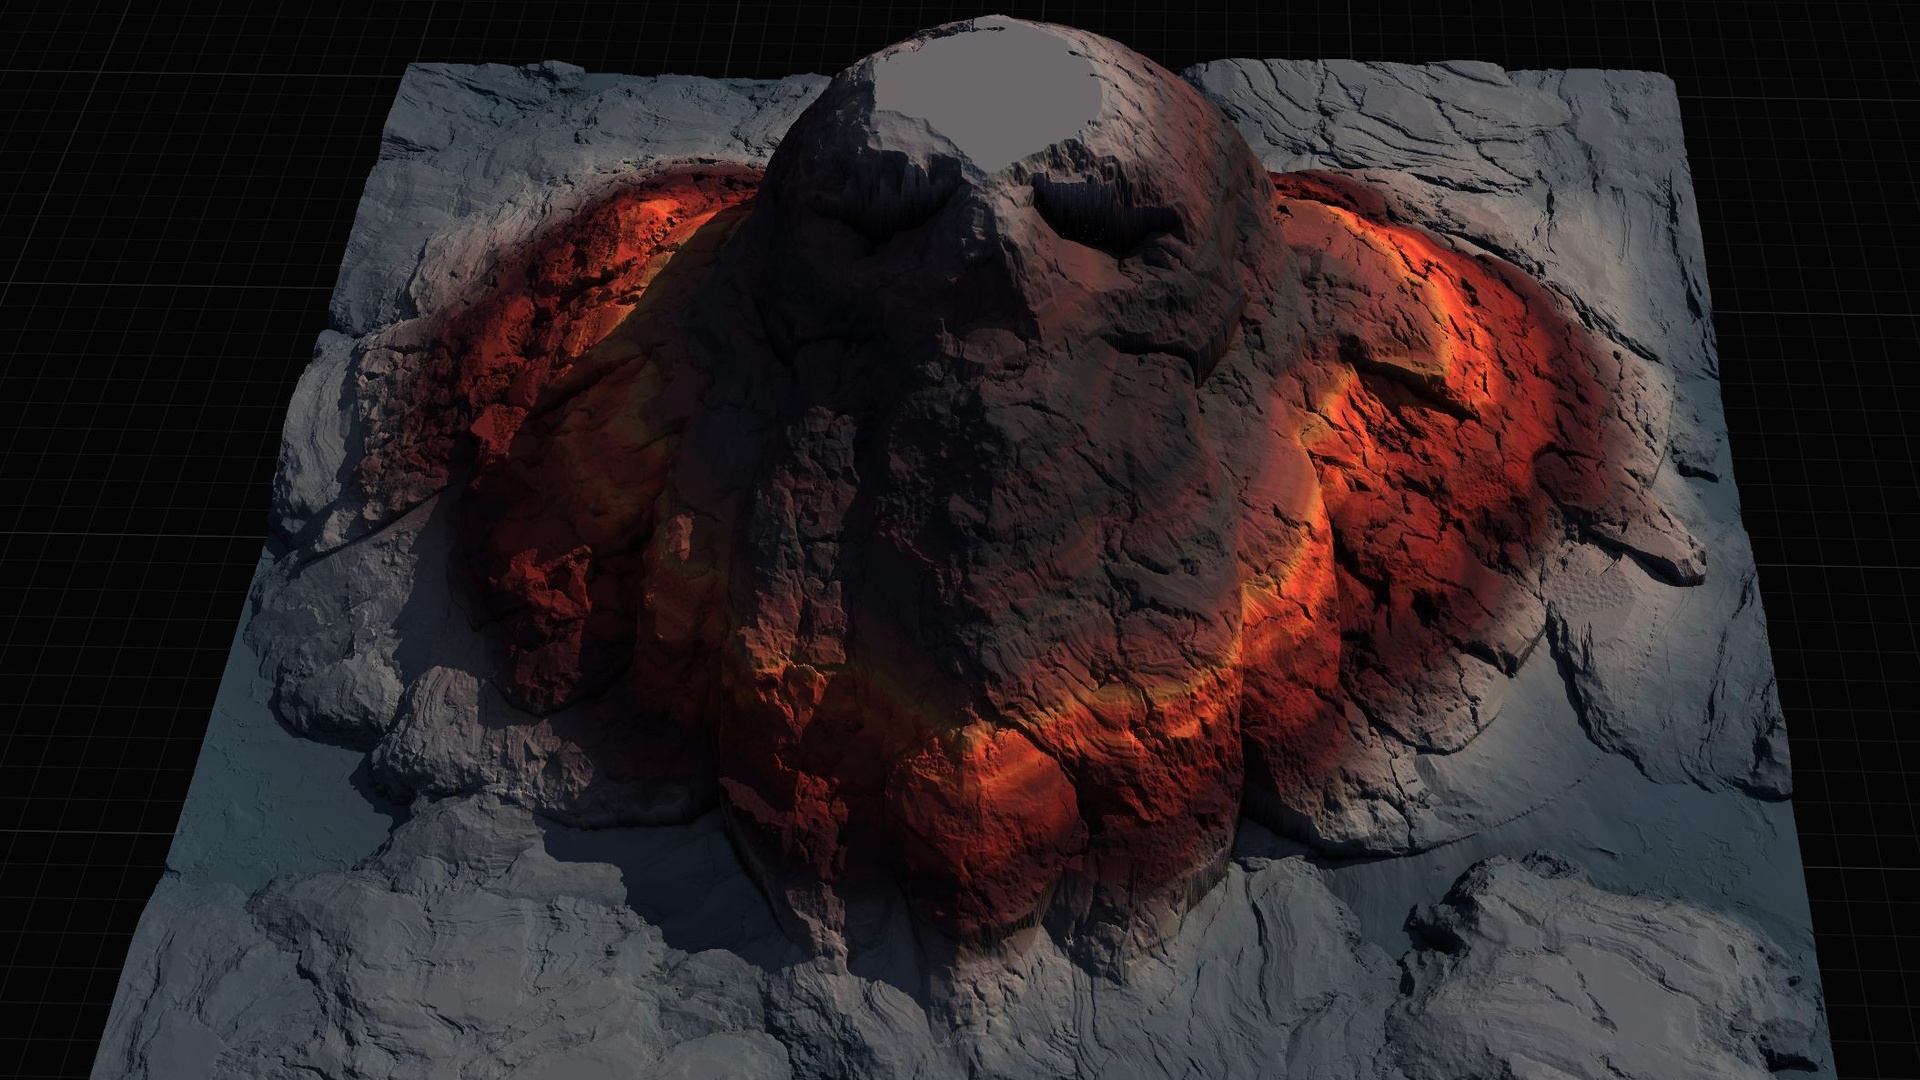
If your project leans fantasy and you want terrain that reads as a recognisable shape - a skull island, a giant stone hand, a fallen-angel isle - the Mythic Relic Landscape Pack is the budget, lore-flavoured entry in the same line. It uses the identical height/slope AutoMaterial and the same Create-Layers-then-Fill workflow, ships 14 mythic maps at the same four resolutions, and adds bonus relic FBX props (skull, statues, books, weapons) to dress the scenes.
When you instead want to build terrain yourself rather than import a finished heightmap, the line's stamp tools take over. Landstamp Pro is a C++ editor plugin that places non-destructive Landscape Patch stamps - mountains, canyons, rivers, craters, volcanoes - that stay editable after placement, with blend modes, falloff shapes, a 10-level priority system and a mesh-to-heightmap extractor that turns any static mesh into a stamp. Landscape Stamp Tool is its lighter, Blueprint-only sibling: drag a stamp blueprint into a World Partition level and it morphs the terrain in place, no C++ required, across seven geological tool types. Sculpt with either of those, then auto-texture the result with the workflow above.
Auto-texture vs sculpt: which MythicLemon landscape tool fits
| Product | Type | What it does | Engine |
|---|---|---|---|
| Massive Open World Landscape Pack | Heightmaps + AutoMaterial | 14 ready-made open-world maps; auto-paints by height/slope | UE 5.7 demo (heightmaps version-agnostic) |
| Mythic Relic Landscape Pack | Heightmaps + AutoMaterial | 14 fantasy 'shape' maps + relic props; same auto-paint workflow | UE 5.5 - 5.6 |
| Landstamp Pro | C++ editor plugin | Non-destructive terrain stamps with mesh-to-heightmap extraction | UE 5.5 / 5.6 / 5.7+ |
| Landscape Stamp Tool | Blueprint-only tool | Drag-in stamp blueprints morph World Partition terrain, no C++ | UE 5.6 - 5.7 |
All four use the same Landscape Patch / AutoMaterial family. Engine and platform figures are per each product's verified source. Windows only.
FAQ
Why does my UE5 landscape turn black after I apply the auto-material?
This is expected and normal, not a bug. The AutoMaterial is a layer-blended material, and immediately after assignment none of its layers carries any weight, so there is nothing to display and the landscape falls back to black. Switch to the Paint tab, run 'Create Layers from Assigned Material', then right-click the 'AutoMaterial Base Layer' and choose 'Fill Layer' - the terrain resolves into a fully textured surface.
How does an auto material paint a landscape by height and slope in Unreal?
The material samples each point's world height and surface incline and maps them to texture tiers: high and flat becomes snow, steep faces become cliff rock, and mid and lower elevations grade through Mid-High, Mid-Low and Ground. You fill a single base layer and the material distributes the rest automatically, so re-sculpting the terrain moves the snow line and cliff faces with it - no repainting.
Where do I change the textures and the snow line?
In the Material Instance ('MI_AutoLandscape_Inst'), not in the extracted paint layers. The instance exposes a base colour and normal map per tier plus height and slope intensity parameters. Swap a tier's textures to retexture that band everywhere; raise the snow height threshold to push snow higher; lower the cliff slope threshold to expose more rock. Never edit the extracted LayerInfo targets to change the look.
Do I have to paint snow, cliff and ground separately?
No. That is the point of the auto-material. You fill only the 'AutoMaterial Base Layer' and the material's height/slope rules decide the named tiers for you. The five additional custom layers exist solely for cases where you want to hand-paint your own art over the automatic result - a dirt path, a specific patch of terrain - and override what the rules produced there.
What if my terrain is wrong before I texture it?
Auto-texturing needs terrain worth painting. Import one of the pack's 14 heightmaps (or re-edit the supplied Gaea source first), or sculpt your own with the line's stamp tools - Landstamp Pro for non-destructive C++ stamps, or the Blueprint-only Landscape Stamp Tool for drag-in World Partition morphing - then apply the AutoMaterial workflow above.
Massive Open World Landscape Pack
Fourteen ready-to-play open-world landscapes with an auto-material setup — 56 heightmaps from 1K to 8K, including volcanic islands and oceans. Drop in, paint your own textures and build your world.