tutorial · 2026-05-14
Your First Unreal Engine Landscape from a Heightmap: A Beginner Walkthrough
Import a ready-made grayscale heightmap, auto-paint it by height and slope, and fix the dreaded black landscape, step by step.
Why start from a heightmap?
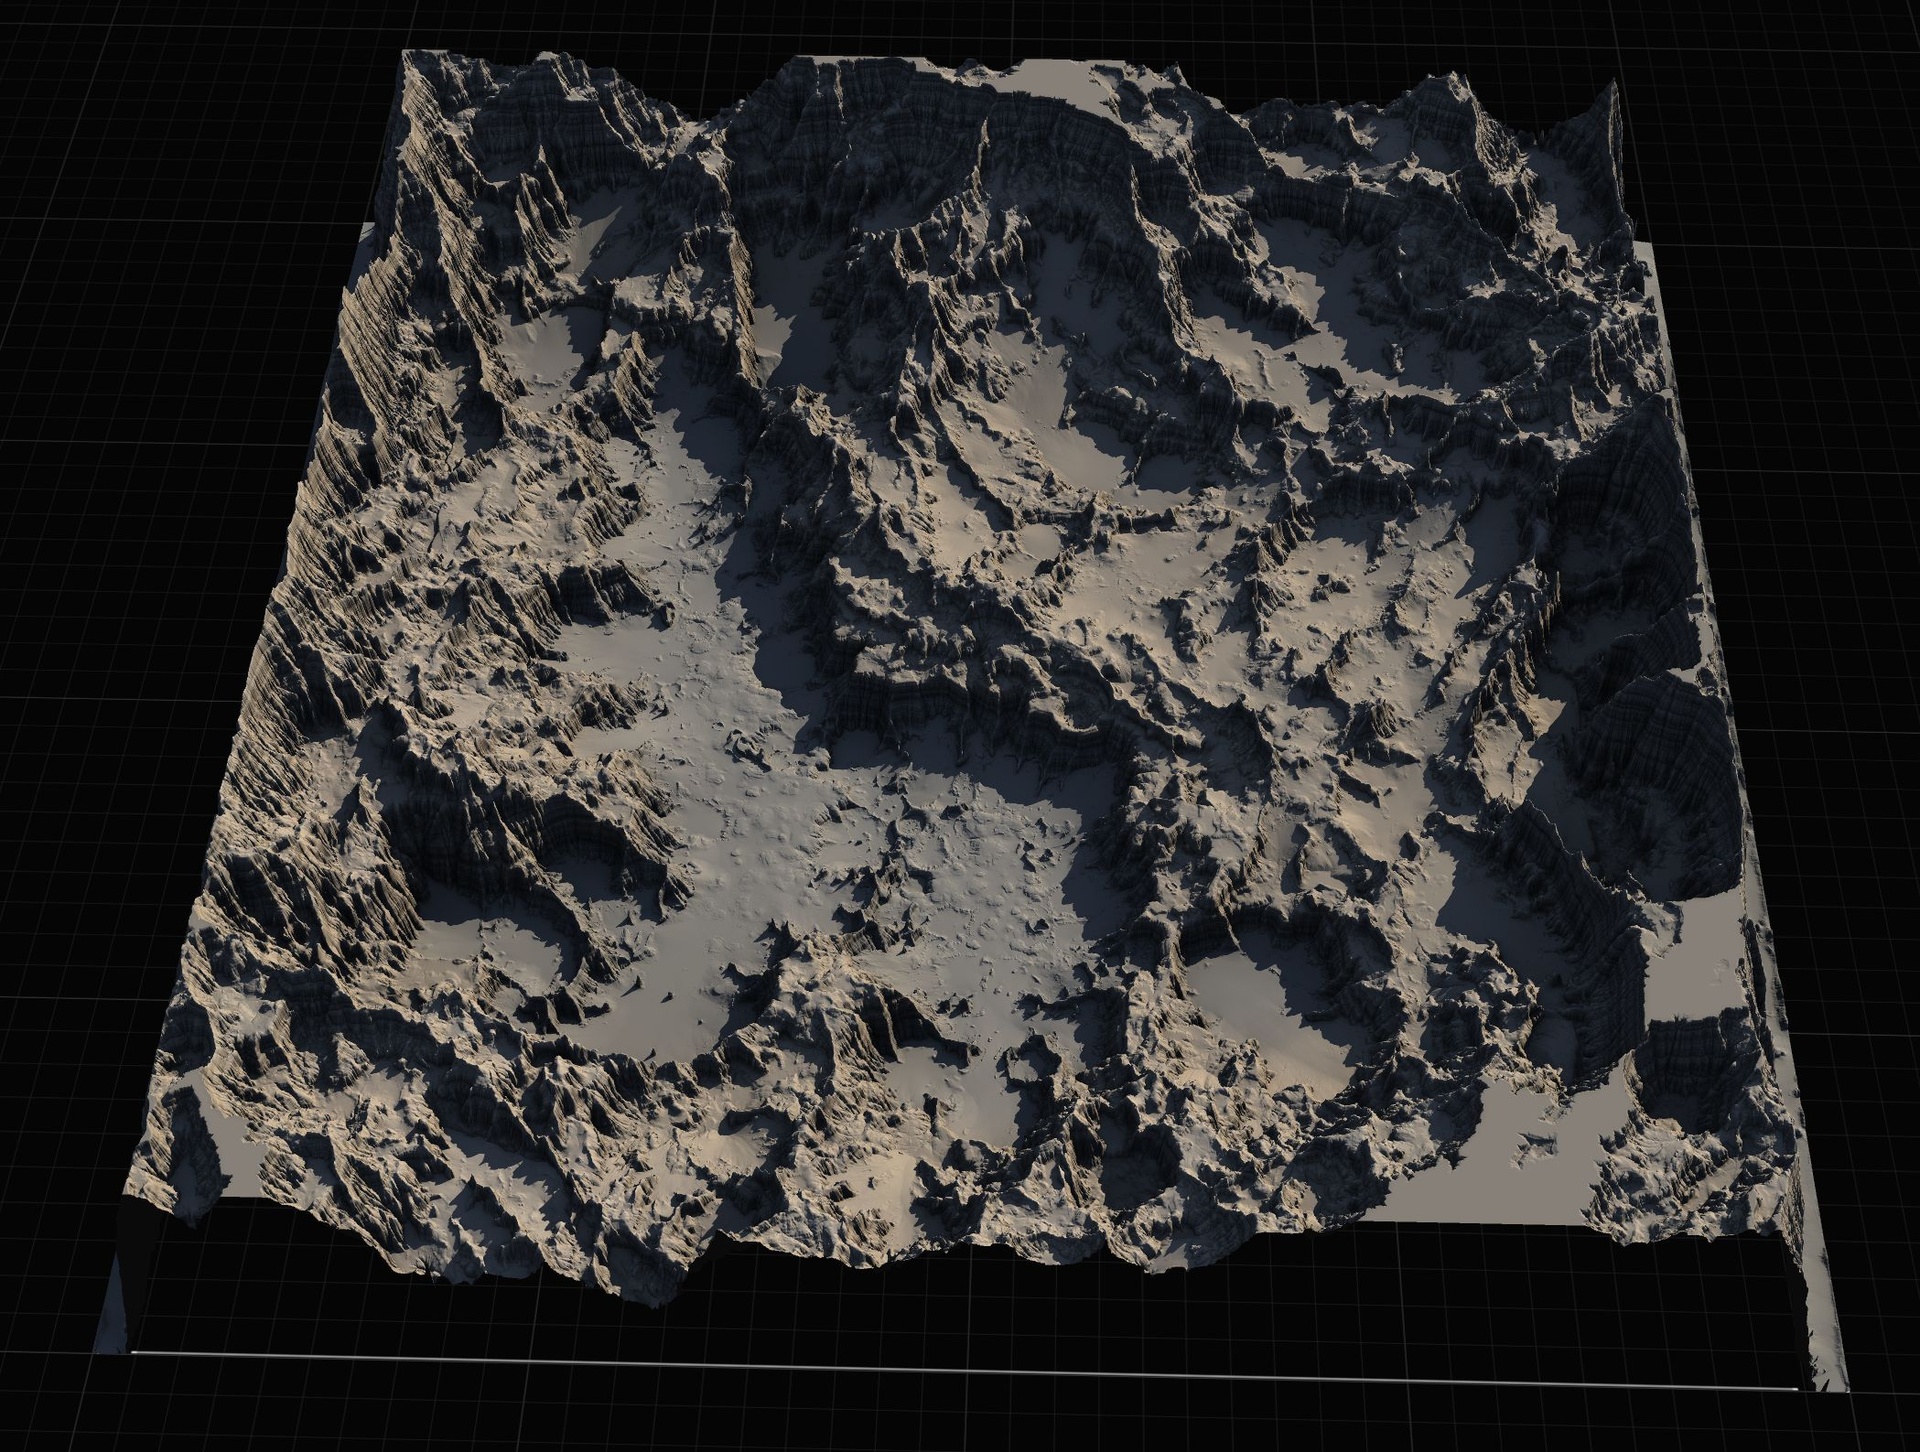
If you have ever opened the Landscape tool in Unreal Engine 5 and tried to sculpt a believable mountain by hand, you already know the problem. Manual sculpting is slow, it is unforgiving, and a flat plane pushed around with the sculpt brush rarely looks like real terrain. The fastest way to get a convincing landscape on screen, especially as a beginner, is to import one that has already been shaped for you: a grayscale heightmap.
A heightmap is just a grayscale image where the brightness of each pixel encodes elevation. Whiter pixels are higher, darker pixels are lower. Unreal reads that image and builds the terrain mesh from it. This is exactly the beginner Unreal landscape from heightmap tutorial workflow this guide walks through, end to end, using a ready-made map so you can focus on learning the import and texturing steps rather than on art.
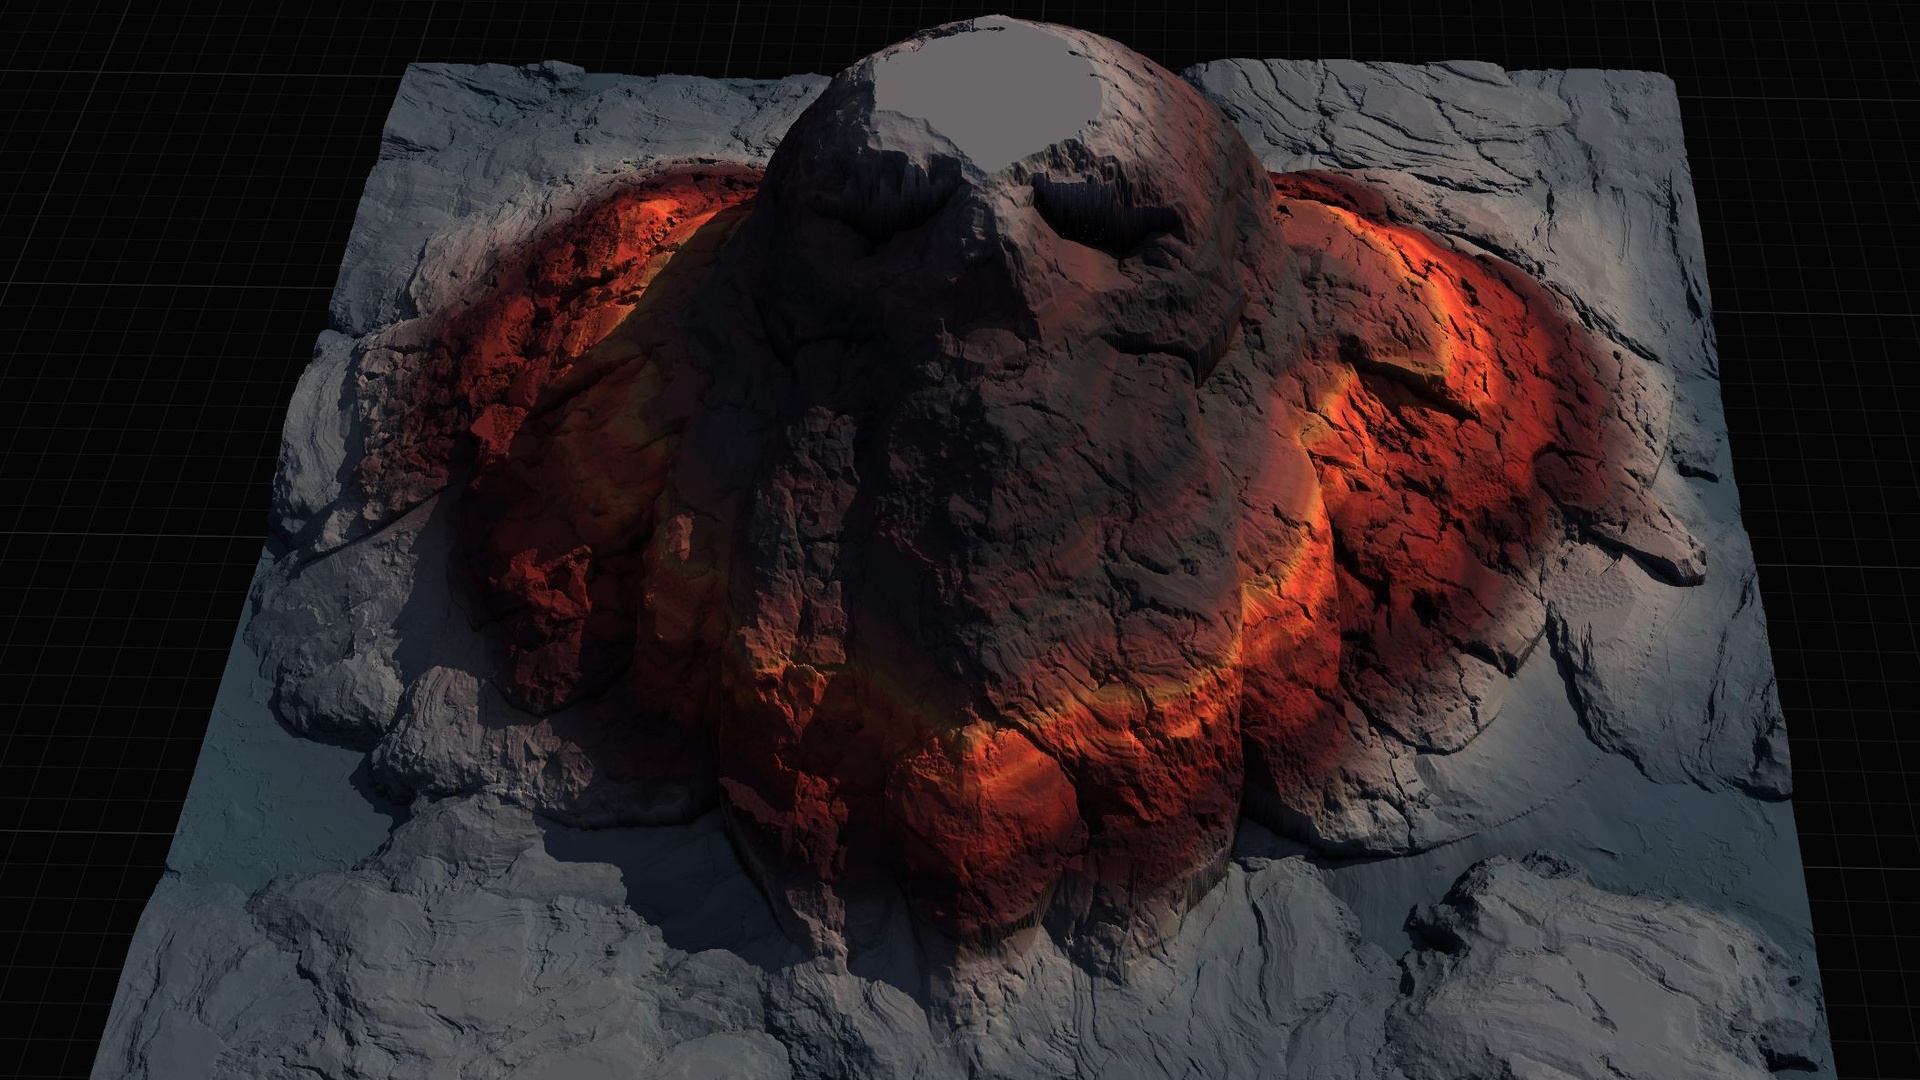
The examples here use the Mythic Relic Landscape Pack, a beginner-friendly, paint-your-own-textures pack of 14 fantasy landscapes whose terrain forms legendary shapes such as a giant stone hand, a skull island and a fallen-angel island. Each map ships 16-bit grayscale heightmaps at four resolutions, a demo level, a Gaea source file and an included AutoMaterial. That gives you a real, interesting terrain to import instead of a procedurally bland test plane, but every step below applies to any 16-bit grayscale heightmap you import into UE5.
Step 1: Grab a ready-made grayscale heightmap
Before you touch Unreal, pick the heightmap file you want to import. In the Mythic Relic Landscape Pack each of the 14 maps ships at four resolutions: 1K, 2K, 4K and 8K, all 16-bit grayscale PNG. The exact pixel dimensions are 1009x1009 for 1K, 2017x2017 for 2K, 4033x4033 for 4K and 8129x8129 for 8K. Those slightly odd numbers are deliberate: they are Unreal landscape-friendly dimensions, so the importer will not complain about resolution.
Choose your size by how big a world you actually need. A 1K or 2K heightmap is plenty for a small set-piece island or a sub-region you will explore on foot. The 8K version is for a full open world. As a beginner doing this for the first time, start with a 1K or 2K map: it imports faster, it is lighter on memory, and you get the same shape to learn on.
Note the file path. You will browse to this exact PNG inside Unreal in the next step. For this pack the heightmaps live in each map's Height Maps folder, and there is also a Source Heightmap.png reference per map if you want to inspect the grayscale before importing.
Step 2: Import the heightmap as a landscape
Now open Unreal and create or open the level you want the terrain in. The import lives in the Landscape tool, which you reach from the Modes dropdown at the top-left of the level editor: switch from 'Selection' mode to 'Landscape' mode.
1. With Landscape mode active, click the 'Manage' tab at the top of the Landscape panel. This is where new landscapes are created.
2. Under 'New Landscape', choose the 'Import from File' option rather than 'Create New'. A 'Heightmap File' field appears.
3. Click the '...' button next to 'Heightmap File' and browse to the grayscale PNG you chose in step 1. Unreal reads the image dimensions automatically and fills in the landscape section and component counts for you.
4. Leave the location, rotation and scale at their defaults for your first import. You can always reposition the landscape later. Then click the 'Import' button at the bottom of the panel.
Unreal builds the terrain from the heightmap. You should now see the shape of your landscape in the viewport, almost certainly rendered in a flat, untextured grey or, more likely, solid black. That is expected and we fix it next. If the importer rejected your file, double-check that it is a 16-bit grayscale image at one of the supported sizes, not an 8-bit or colour PNG.
Step 3: Apply the AutoMaterial
A raw imported landscape has no material, so it cannot paint itself by elevation. The Mythic Relic Landscape Pack includes an AutoMaterial: a landscape material that auto-paints the terrain by configurable height and incline rules, with named layers (Base, Snow, Cliff, Mid-High, Mid-Low and Ground) plus five custom layers reserved for hand-painting your own textures on top.
1. Select your landscape in the viewport or the Outliner so its 'Details' panel is showing.
2. In the Details panel find the 'Landscape Material' slot under the Landscape section.
3. Assign the pack's AutoMaterial (or, better, a Material Instance of it) into that slot. Using a Material Instance is the right habit, because the instance is where you will later tweak textures and the height and slope thresholds without recompiling the base material.
After assigning the material your landscape will very likely turn solid black. This catches out almost every beginner, so do not panic: it is the normal, expected state for an auto-painted landscape that has no layer data yet. The next step fills that data in.
Step 4: Fix the black landscape and fill the base layer
The reason the terrain is black is that the AutoMaterial paints using landscape layers, and right after you assign the material those layers contain no weight data. The material is asking 'how much of each layer is painted here?' and the answer everywhere is zero, which renders as black. You fix it by creating the layers and then filling the base layer so the auto-paint logic has something to work with.
1. Still in Landscape mode, switch to the 'Paint' tab at the top of the Landscape panel. You will see a 'Layers' list, which is currently empty or missing target layers.
2. Click 'Create Layers from Assigned Material' (sometimes shown as a button or a right-click option in the Layers area). This reads the AutoMaterial and extracts its target layers, including the base layer, so they appear in the list.
3. Right-click the base layer in the Layers list and choose 'Fill Layer'. This paints that layer across the entire landscape at full weight.
The moment you fill the base layer, the AutoMaterial springs to life: the terrain paints itself by height and slope, low ground gets ground textures, steep faces get cliff, high peaks pick up the upper tiers, and the black vanishes. If it is still black, confirm you assigned the AutoMaterial (not an empty slot) and that the Create Layers step actually populated the Layers list before you tried to fill. A tip from the pack's own workflow: do not edit the extracted layers directly. If you want different looks, edit the Material Instance and re-create the layers.
Step 5: Walk around your terrain
With the AutoMaterial painting correctly you have a finished, textured landscape. The last thing to do is actually move through it, because a terrain always reads differently at eye level than from the orbiting editor camera.
Click into the viewport and use right-click plus the W, A, S and D keys to fly around in the editor. To experience it at player height, press the 'Play' button in the toolbar to enter Play-In-Editor and walk the terrain with the default character. Look at where the cliff layer meets the ground, where snow appears on the highest peaks, and whether the scale feels right for the kind of game you are making.
From here you have several natural next steps. To restyle the terrain, open the Material Instance and swap the per-layer base colour and normal textures, or adjust the height and slope thresholds that decide where each layer appears. To customise the actual shape, the pack includes a Gaea .terrain source per map that you can re-edit and re-export. And because these maps are relic-themed, the pack also ships bonus FBX props such as a skull, a turtle statue, an Anubis figure and a fallen-angel statue that you can drag in to dress the scene. You have now imported, textured and explored your first Unreal Engine landscape from a heightmap.
Where to go next: stamping and bigger worlds
Importing a whole heightmap is the right starting point, but it is not the only way to shape terrain, and once you are comfortable you will want more control. If your project needs sprawling, explore-the-continent scale, the Massive Open World Landscape Pack uses the identical import-and-AutoMaterial workflow you just learned, with 14 open-world maps at the same 1K to 8K resolutions and Water-enabled demo levels for oceans.
If instead you want to compose terrain from editable pieces rather than commit to one baked heightmap, look at stamping tools built on Unreal's Landscape Patch system. Landstamp Pro is a C++ editor plugin that places non-destructive stamp actors you can re-position, re-scale and re-blend at any time, with a large stamp library and a tool that turns any static mesh into a custom stamp. Landscape Stamp Tool is its lighter, Blueprint-only sibling: drag a tool blueprint into a World Partition level and it morphs the terrain in place, no C++ required. Starting with a heightmap import, as you did here, gives you the foundation to understand all of them.
Heightmap resolutions in the Mythic Relic Landscape Pack
| Label | Pixel dimensions | Best for |
|---|---|---|
| 1K | 1009 x 1009 | Small islands and sub-regions, fastest to learn on |
| 2K | 2017 x 2017 | Compact playable areas |
| 4K | 4033 x 4033 | Large regions |
| 8K | 8129 x 8129 | Full open worlds |
All maps ship at four sizes as 16-bit grayscale PNG. Exact pixel dimensions are Unreal landscape-friendly values; pick smaller maps for sub-regions and 8K for full open worlds.
FAQ
What is the easiest beginner Unreal landscape from heightmap tutorial workflow?
Pick a ready-made 16-bit grayscale heightmap, then in Landscape mode use the Manage tab to Import from File, assign the AutoMaterial in the landscape material slot, switch to the Paint tab, click Create Layers from Assigned Material, and right-click the base layer and choose Fill Layer. That sequence imports, textures and fixes the black landscape in a handful of clicks.
Why is my landscape completely black after I apply the material?
A black landscape is the expected state for an auto-painted material that has no layer weight data yet. Fix it by going to the Paint tab, clicking Create Layers from Assigned Material to extract the target layers, then right-clicking the base layer and choosing Fill Layer. The AutoMaterial then paints by height and slope and the black disappears.
Which heightmap resolution should I import first?
Start with 1K (1009 x 1009) or 2K (2017 x 2017). They import quickly and are lighter on memory while giving you the same terrain shape to learn on. Move up to 4K or 8K when you actually need a large region or a full open world.
What engine versions does the Mythic Relic Landscape Pack support?
Per the product listing it targets Unreal Engine 5.5 to 5.6. The heightmaps themselves are standard 16-bit grayscale images, so the import and AutoMaterial steps in this guide apply broadly across recent UE5 versions.
Can I change the textures and the shape after importing?
Yes. Edit the Material Instance to swap each layer's base colour and normal textures or to adjust the height and slope thresholds; do not edit the extracted layers directly. To change the terrain shape itself, re-edit the included Gaea .terrain source for the map and re-export a new heightmap.
Mythic Relic Landscape Pack
Fourteen fantasy landscapes with an auto-material — 52 heightmaps spanning islands, underworlds and mythic terrain. Beginner-friendly, paint-your-own-textures, ready for any RPG world.