tutorial · 2026-05-04
Build a Fantasy Island Level with Oceans in UE5
Pick the right island heightmap, import and auto-texture it, then drop a Water plugin ocean at exactly the right height.
The problem: an island that reads as an island
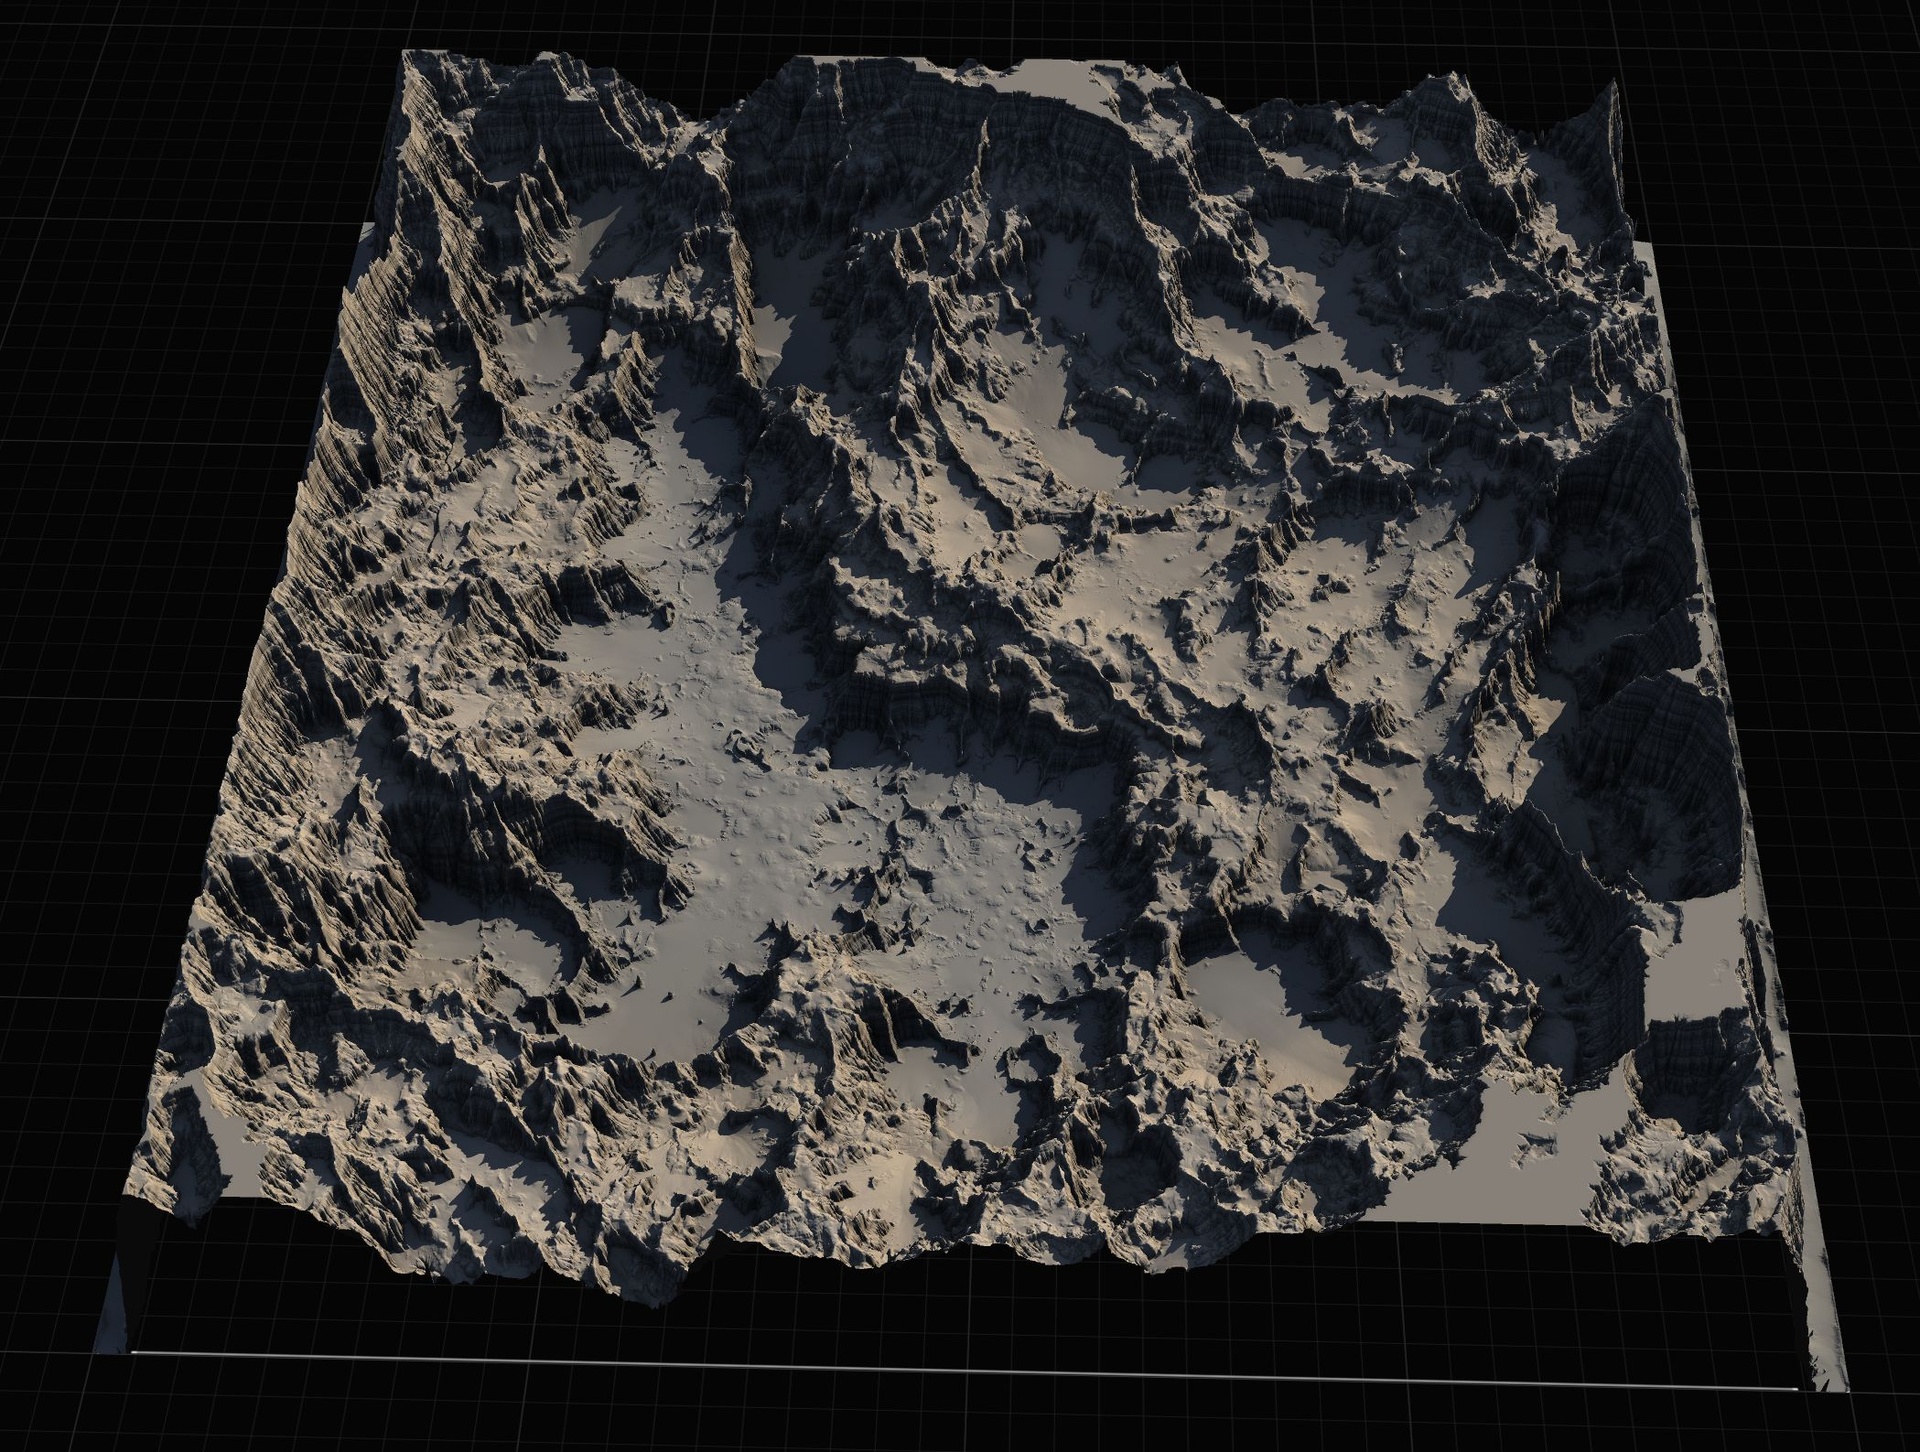
Building an Unreal island landscape with an ocean water level in a fantasy style sounds simple until you try it. Sculpt a vague lump by hand and it never quite reads as land surrounded by sea; the coastline is mushy, the interior is flat, and the ocean either floods the whole thing or leaves an ugly cliff of dry seabed around the edge. The two halves - the terrain and the water - have to be designed together, with the heightmap shaped so there is a clear shoreline for the ocean to meet.
The fastest way to get a believable result is to start from a heightmap that was authored as an island in the first place, then add the ocean at a height that matches the land. The Fantasy Landscape Pack is built for exactly this: it ships grayscale, import-ready heightmaps including several distinct island shapes, an AutoMaterial that paints the terrain by height and slope, and a demo project where each map is already textured, lit, and - where appropriate - has an ocean added. This tutorial walks the full loop, from picking a map to floating water at the right level.
1. Pick the right island heightmap
The pack contains 15 maps across multiple biomes - 11 regular maps plus 4 huge open-world maps - and three of the regular maps are islands, each with a different silhouette. Choosing the right one up front saves you fighting the terrain later.
Isolated Island is ringed by mountains, so the interior is protected by a natural mountain wall and the coast falls away cleanly on every side. It is the most obviously 'island' shape and the easiest to surround with ocean, because the heightmap already drops to low values around the whole perimeter.
Large Island gives you a broader landmass with more usable interior - a better base if you want a settlement, roads, or a playable level area rather than a single dramatic peak. Long Island is the elongated option, useful for a coastline that runs in one direction, a strip of land between two stretches of sea, or a level the player traverses end to end.
Pick by the level you are building, not by which screenshot looks prettiest. Remember that the high-resolution PNGs inside each map's folder are RGBA preview and reference renders, not the heightmaps you import - the actual import files are the grayscale maps under the 'Gray Scale Maps' folder, where whiter pixels mean higher elevation.
2. Import the heightmap as a landscape
Each map in the Fantasy Map Pack lives in its own folder, and the grayscale heightmaps come at four resolutions for the regular maps: 512x512, 1K, 2K and 4K. For a focused island level a 1K or 2K map is plenty; reach for 4K only when you genuinely need the detail and can afford the larger landscape.
1. Open the 'Landscape' panel in the editor, switch to the 'Manage' tab, and choose to create a new landscape from file.
2. Point it at the grayscale heightmap for your chosen island - the file from the 'Gray Scale Maps' folder or the map's Height_Maps folder, not the preview render.
3. Select the resolution that matches the file you imported (512/1K/2K/4K), then create the landscape.
Once it imports you will have the island geometry in your level. Do not be alarmed if it looks bare - texturing is the next step, and a freshly assigned AutoMaterial commonly shows up black until you create its layers.
3. Auto-texture with the AutoMaterial
The pack includes an AutoMaterial that auto-paints the landscape by configurable height and incline rules - snow and rock on the high, steep ground, grass and softer materials lower down - which is exactly the layering an island wants between its peaks and its shoreline. It also exposes 5 optional layers so you can hand-paint your own textures on top of the defaults.
1. Assign the AutoMaterial (or a material instance of it) to the landscape's material slot. Expect the terrain to appear black at first; this is the normal initial state.
2. Open the 'Landscape' tool, go to the 'Paint' tab, and use 'Create Layers from Assigned Material' to extract the target layers.
3. Right-click the base layer and choose 'Fill Layer' to paint the whole landscape by height and slope in one pass.
From there, tune the look in the Material Instance - swap textures and adjust the height and slope intensity so the snow line and the grass-to-rock transitions sit where you want them. Note that the demo levels reference UE starter-content textures that are intended to be swapped for your own art, so plan to replace them for a finished fantasy look. Use the 5 custom layers for anything the auto-paint cannot express, such as a worn path or a beach band along the waterline.
4. Add an ocean with the Water plugin at the right height
An island is only an island once there is sea around it, and the cleanest way to do that in UE5 is the engine's built-in Water plugin. The fastest way to see the intended result is to open the pack's included demo project, which ships as LandscapeDemo.uproject: each map has a demo level that is already textured, lit, and has oceans added where appropriate. Open the demo for your island to see how the water sits against that exact terrain before you wire it up in your own level.
If you are doing it in your own project, the key is height. The ocean has to sit at the elevation where your island's coastline naturally falls to sea level, otherwise it will either drown the lowlands or leave a ring of exposed seabed.
1. Enable the Water plugin for the project (its 'Water Body Ocean' is what you place for open sea). The sister Massive Open World Landscape Pack ships a demo project that enables the Water plugin specifically to add oceans to its island maps, so the workflow is the established one across the MythicLemon landscape line.
2. Place a Water Body Ocean actor in the level so it surrounds the island.
3. Adjust its Z height until the waterline meets the terrain where you want the shore - just below the lowest land you want to keep dry, so beaches and inlets read correctly.
4. Walk the full coastline and check for spots where the water cuts into a hill or leaves a gap; nudge the height, or sculpt the shoreline slightly, until the meeting line looks natural the whole way round.
Because the island heightmaps were authored with a clear perimeter drop, you usually find a single ocean height that works for the entire coast, which is the whole point of starting from a purpose-built island map.
5. Composition for an island level
With land and sea in place, the composition work is what turns a heightmap into a level. Use the island's natural geography: on Isolated Island, the ring of mountains is a ready-made boundary that keeps players in the playable interior without an invisible wall; on Long Island, the elongated shape lends itself to a journey from one end to the other.
Set your camera and key views from the shore looking inland and from a high point looking out to sea - those are the shots that sell a fantasy island, so light and dress the level for them. Keep the AutoMaterial's transitions tidy where the eye lingers, especially the beach-to-grass band right at the waterline.
If you need to reshape the coast or carve a harbour, you have options without leaving the data behind. The pack includes Gaea source files so you can re-edit the original landscape and re-import it. Alternatively, the next step below covers non-destructive stamping tools for adding or subtracting terrain features in-editor after import, which is handy for last-mile tweaks like a cove, a sandbar, or a second smaller islet.
Where to go next
The Fantasy Landscape Pack gives you the islands, the AutoMaterial, and ocean-ready demo levels to build this whole scene from a standing start. If your ambitions are larger - a full explorable world or an archipelago - the sister Massive Open World Landscape Pack ships heightmaps at 1K, 2K, 4K and 8K, several island maps of its own, and a demo project that enables the Water plugin for oceans, so you can scale the same workflow up to an 8K continent.
For shaping coastlines and adding features after import, the landscape line also has two stamping tools. Landstamp Pro is a C++ editor plugin that places non-destructive, always-editable stamps (mountains, canyons, craters, rivers) on a landscape and can even turn a static mesh into a custom stamp. Landscape Stamp Tool is its lighter, Blueprint-only sibling - drag a stamp tool into a World Partition level and it morphs the terrain in place, with the Water plugin already part of its setup. Pick the heightmap pack to start your island, and reach for a stamping tool when you want to sculpt the coast further.
Which island heightmap to pick
| Heightmap | Shape | Best for |
|---|---|---|
| Isolated Island | Ringed by mountains, clean drop to sea on every side | An enclosed island level with a natural mountain boundary and easy all-round ocean |
| Large Island | Broad landmass, more usable interior | Settlements, roads, or a level area that needs flat-ish playable ground |
| Long Island | Elongated strip of land | A coastline running one way, or a traverse from one end to the other |
All three are regular maps available at 512/1K/2K/4K; the silhouette is what differs.
FAQ
How do I build an Unreal island landscape with an ocean water level in a fantasy style quickly?
Start from a purpose-built island heightmap rather than sculpting by hand. Import one of the pack's island maps (Isolated Island, Large Island or Long Island) as a UE landscape, apply the AutoMaterial and fill it by height, then enable UE's Water plugin and place a Water Body Ocean, adjusting its height until the waterline meets the coast. The pack's demo levels already show each map textured and oceaned, so you can match the intended result.
Which file do I actually import - the heightmap looks like a colour render?
Import the grayscale heightmap from the 'Gray Scale Maps' folder (or each map's Height_Maps folder), where whiter pixels mean higher elevation. The high-resolution colour PNGs in each map's folder are RGBA preview and reference renders, not the import heightmaps - do not import those.
Why is my landscape black after I assign the AutoMaterial?
That is the expected initial state. In the Landscape tool's Paint tab, use 'Create Layers from Assigned Material' to extract the layers, then right-click the base layer and choose 'Fill Layer' to auto-paint the terrain by height and slope. You can then tune textures and the height/slope intensity in the Material Instance.
How do I get the ocean at the right height so it doesn't flood or leave a dry edge?
Enable the Water plugin, place a Water Body Ocean around the island, and adjust its Z height until the waterline sits just below the lowest land you want to keep dry. Because the island heightmaps drop cleanly around the whole perimeter, you can usually find one ocean height that works for the entire coast. Open the included demo level for that map to see the intended waterline.
Can I reshape the coastline after importing?
Yes. The pack includes Gaea source files so you can re-edit the original landscape and re-import it. For in-editor tweaks you can also use a stamping tool - Landstamp Pro (a C++ editor plugin with non-destructive, editable stamps) or the Blueprint-only Landscape Stamp Tool - to add or subtract coastal features like coves and islets.
Fantasy Landscape Pack
A collection of diverse fantasy heightmap landscapes across multiple biomes — drop-in terrains for RPGs and open worlds, ready to dress and play.