tutorial · 2026-06-01
How to Build a Gothic Graveyard Scene in Unreal Engine 5
A practical, set-dressing-first workflow for assembling a believable fantasy cemetery from weathered marble statues, funerary urns and ritual jars.
What a gothic graveyard actually needs before you place a single mesh
If you have ever tried to make a graveyard or cemetery scene in Unreal Engine for a fantasy world, you already know the trap: you drop in a handful of headstones, scatter some fog, and it reads as a flat field of clutter rather than a place that was built, used and abandoned. A convincing gothic graveyard is not a pile of props. It is a layout with intent — rows that imply order, paths that imply foot traffic, and a few tall focal monuments that the eye lands on first and the player walks toward.
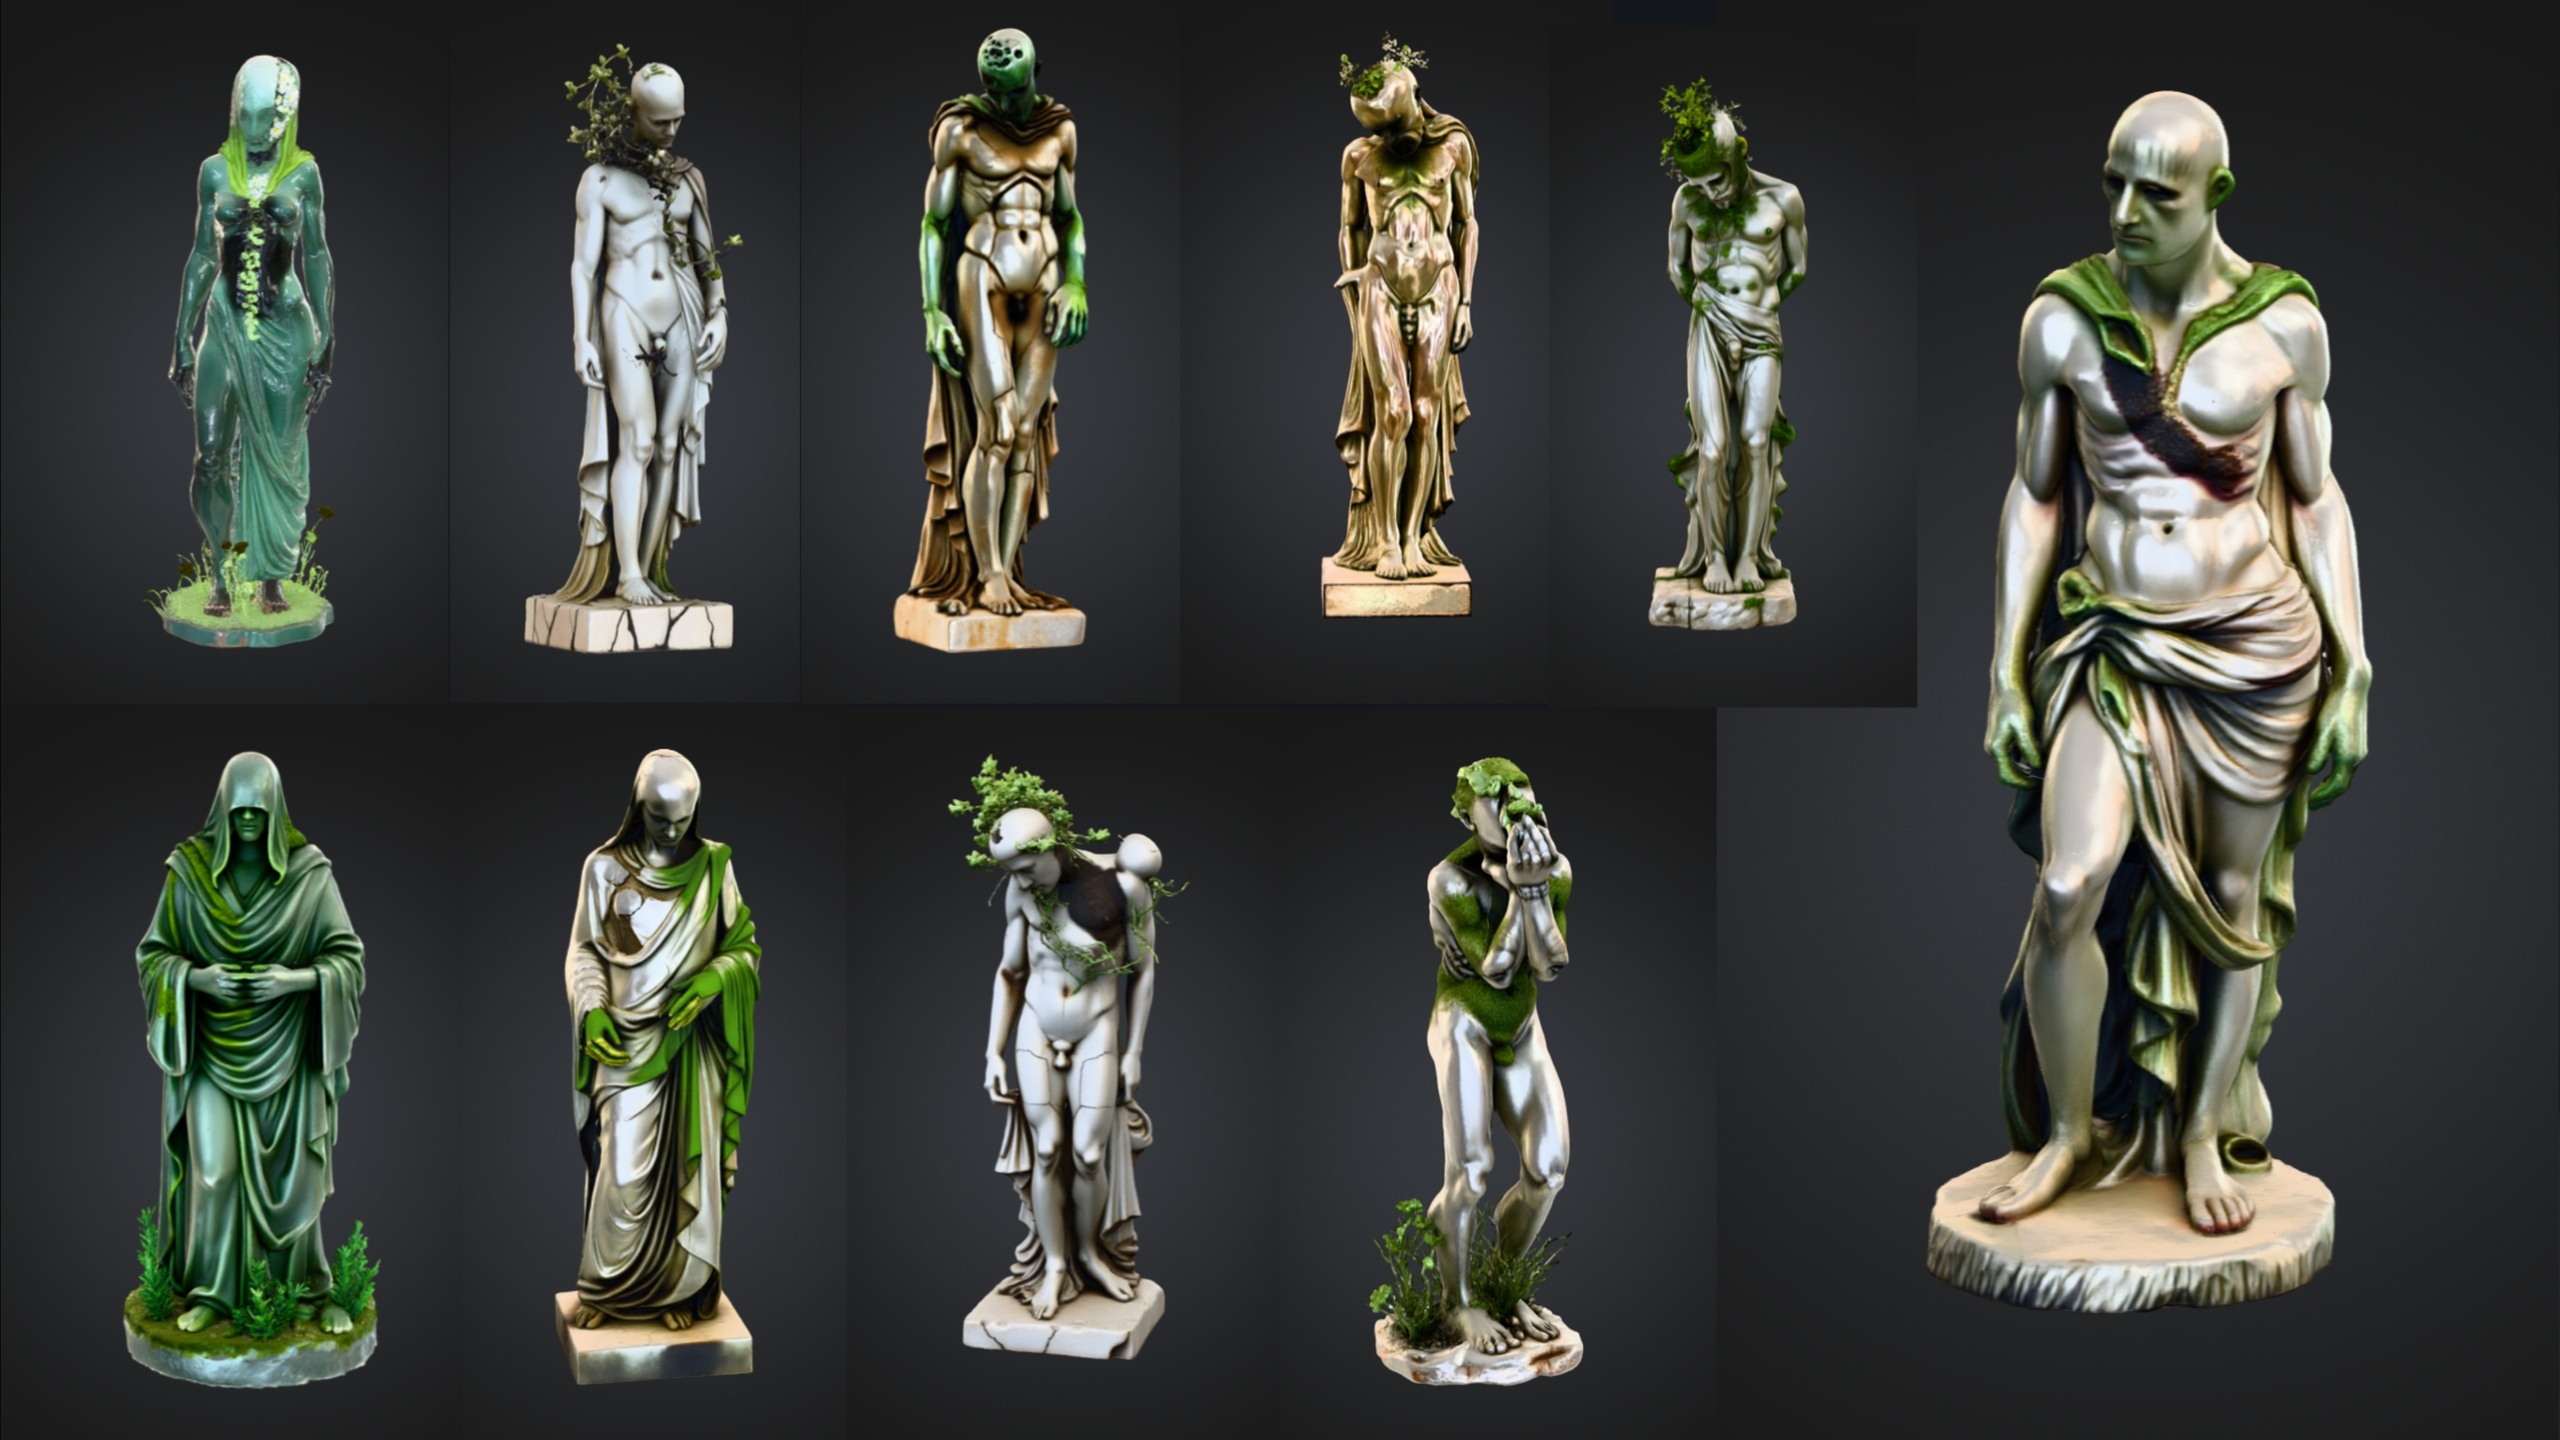
This tutorial builds that scene around the Fantasy Statue Bundle, a dark-fantasy set of 18 weathered marble statues split into two themed series of nine: a Nature marble series (SM_NatureStatue_1 through SM_NatureStatue_9) and a Tormented Souls series (SM_TormentedStatue_1 through SM_TormentedStatue_9). It also ships an additional large table mesh, SM_LargeTable, which makes a serviceable plinth, altar base or tomb slab — 19 static meshes in total. Every statue is a Nanite mesh with automatic collision and its own 2K PBR material, so the moment you drag one into the level you can walk around it and it casts and receives shadows correctly.
Because the meshes are Nanite, you do not author or manage LODs for the high-detail marble — you place the hero asset and move on. That changes how you should think about layout: you are free to use the same handful of statues many times across a large area without a polygon budget forcing you to swap in cruder stand-ins at distance. Set dressing, not optimisation, becomes the thing you spend your time on.
Step 1 — Block out rows, paths and focal tombs
Start with the bones of the space before any decorative dressing. A graveyard reads as designed when there is a clear hierarchy: a primary path the player follows, secondary rows of graves running off it, and one or two focal monuments that anchor the composition.
1. Lay the primary path first. Carve or model a single walkable route through the graveyard — a gravel track, a flagstone causeway, or simply a worn strip of ground. Everything else gets arranged relative to this line, because the path is what the player's camera will travel along and therefore what your whole composition is read from.
2. Place your focal tombs. Pick two or three of the tallest, most striking statues — the Tormented Souls series reads well here because the silhouettes are more dramatic — and set them at the visual ends of the path or at a junction. These are your landmarks. Use SM_LargeTable beneath one as a raised plinth or tomb slab so a focal statue sits above eye level and dominates its corner of the scene.
3. Run rows off the path. Drag in Nature and Tormented statues in loose parallel rows flanking the route. Keep the spacing slightly irregular — a perfectly even grid reads as a prop array, whereas small offsets in position and a few degrees of rotation per statue read as graves settled over centuries.
4. Vary scale and rotation deliberately. Select a statue and nudge its Z-rotation in the 'Details' panel so no two adjacent monuments face exactly the same way. Tilt one or two a couple of degrees off vertical to suggest subsidence. This single habit does more for believability than any amount of extra geometry.
5. Bake the layout into instances once you are happy. For repeated landmark statues across a large open-world area, add the mesh to an Instanced Static Mesh component or a Foliage type and paint them in. The dossier workflow calls this out specifically for repeated placement, and it keeps a large graveyard cheap to render and trivial to re-seed.
Step 2 — Mix statues, urns and jars so it doesn't read as one kit
A graveyard built entirely from one set of statues betrays itself quickly — the eye spots the repetition and the spell breaks. The fix is to interleave a second and third silhouette family so the scene feels accreted rather than installed in a single afternoon.
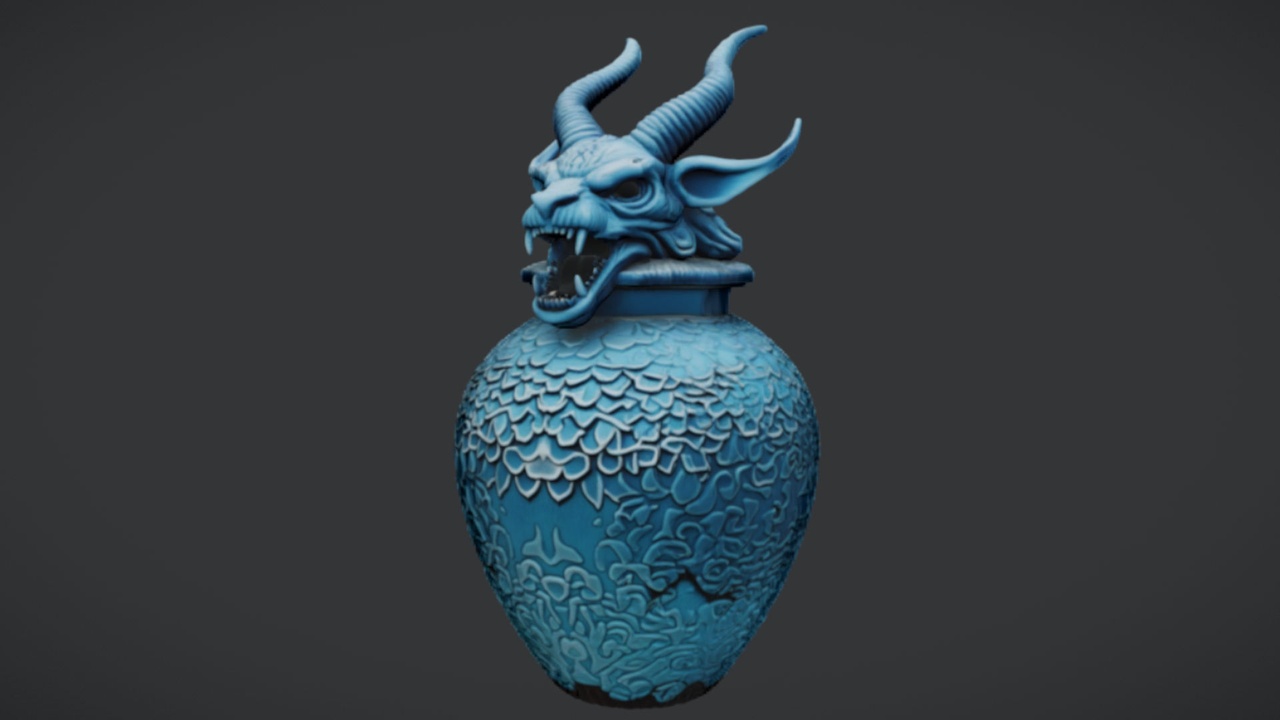
The Azure Gargoyle Urn is the cheapest way to do this because it is free: a single ornate funerary urn with an azure-toned gothic finish and 2K PBR textures, ready to drop straight into UE5. Place it on plinths, on the SM_LargeTable, or at the foot of a focal tomb as a funerary accent. Because it is one distinctive vessel rather than a whole kit, a little goes a long way — use it sparingly at the points the eye already lingers.
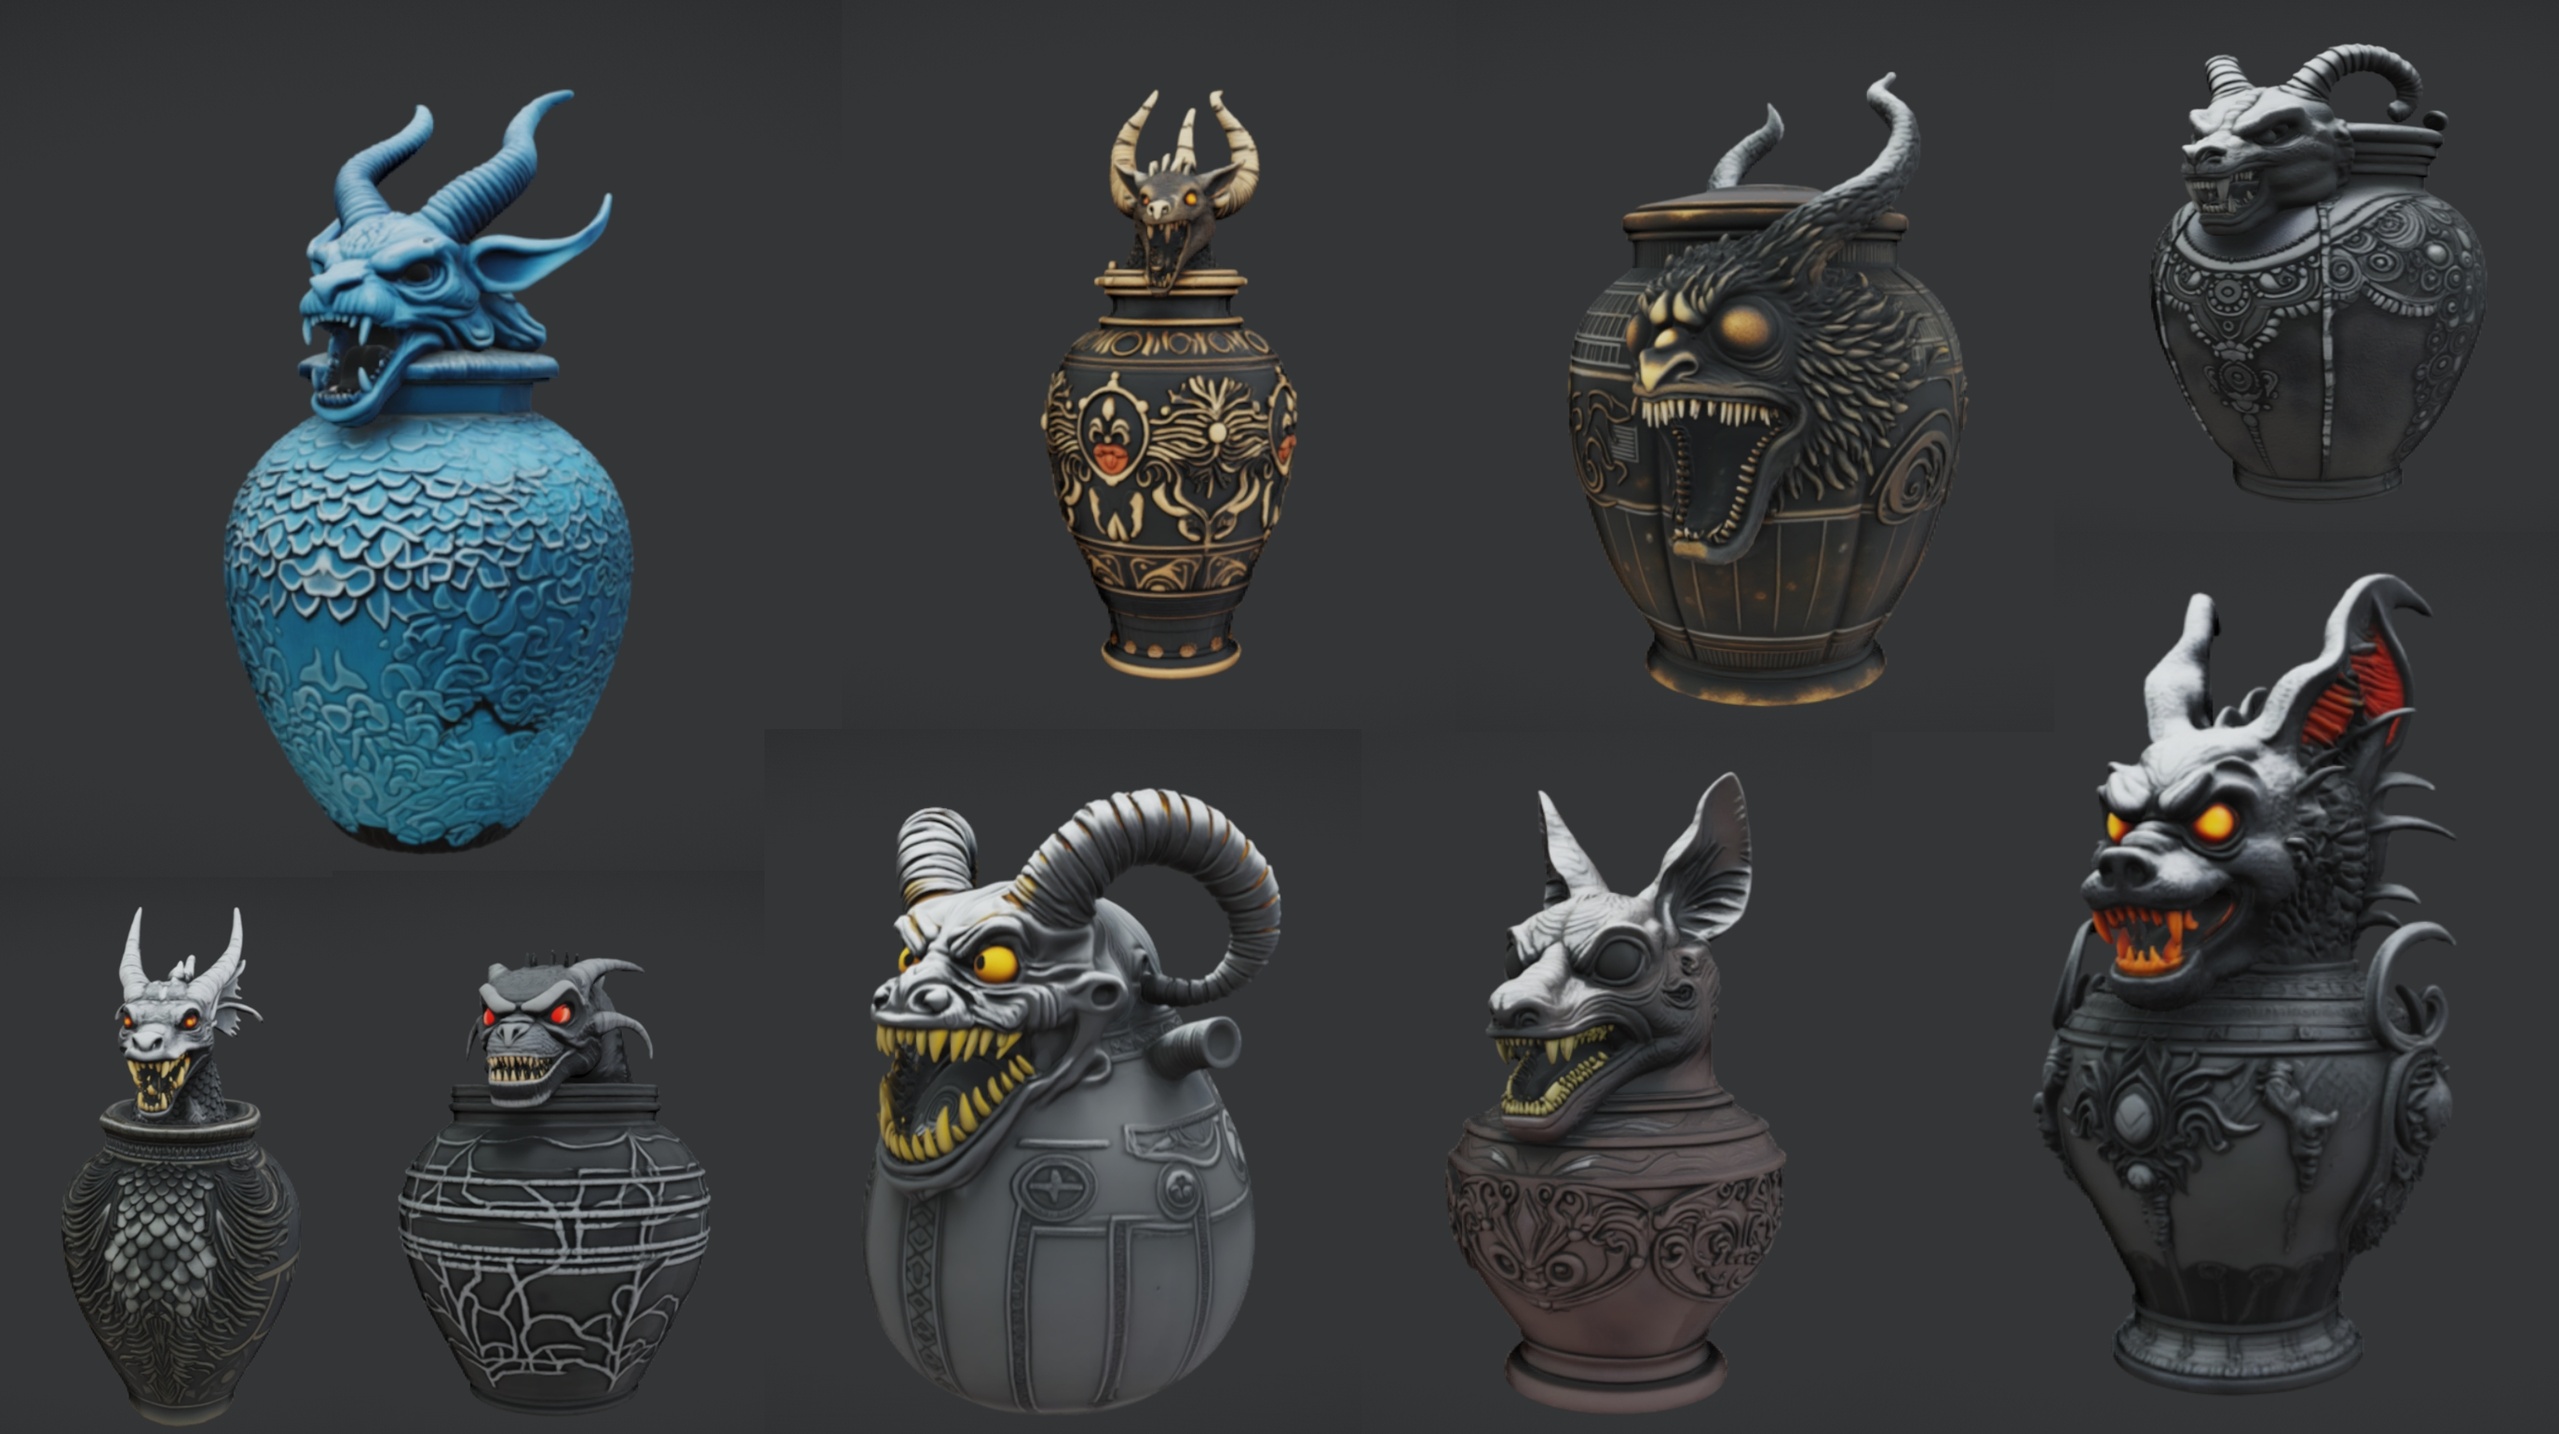
Ritual Jars adds a different vocabulary again: nine ornate canopic-style jars (SM_RitualJar_1 through SM_RitualJar_9) with an Egyptian, gothic and abyssal aesthetic, each a Nanite mesh with automatic collision and 2K PBR maps. Arrange a cluster of these on the included large table to build an altar or offering shrine inside a mausoleum corner of your graveyard. One caveat worth respecting from the source material: Ritual Jars is authored for Unreal Engine 5.7 specifically, so opening it in an older engine may trigger an engine-version upgrade prompt — plan your project version accordingly before you migrate it in.
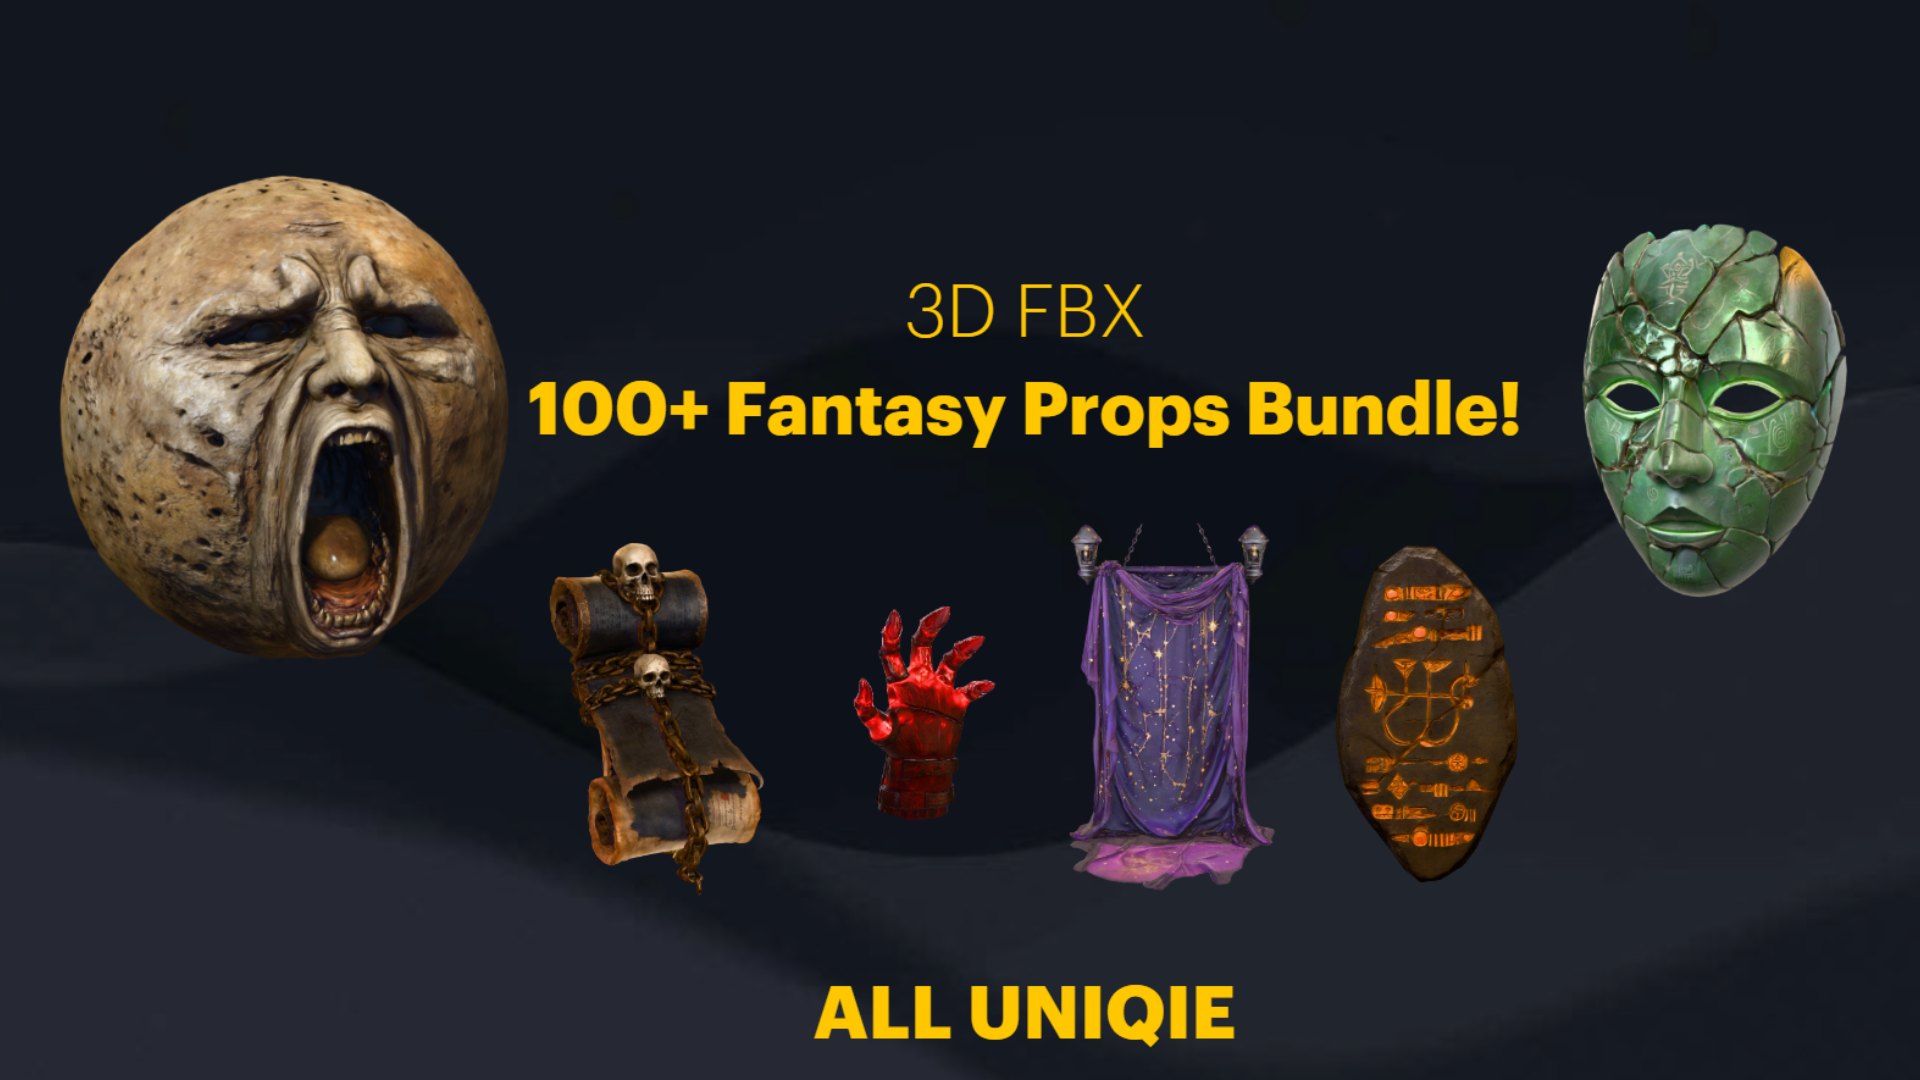
If you want to furnish a fuller scene fast — crypt interiors, a wizard's mausoleum, throne-room boss arenas adjoining the cemetery — the Dark Fantasy Props Bundle carries 100-plus unique gothic static meshes (the content folder holds around 105 SM assets), each with its own bespoke material and Nanite enabled, plus a Demo map that shows the props arranged. It is the broad-coverage option when statues and jars alone are not enough to dress the surrounding architecture.
Step 3 — Tone-match the weathered marble across every prop
The single thing that most often gives away a kit-bashed graveyard is mismatched material tone. The Fantasy Statue Bundle ships a weathered marble and stone aesthetic, and your job is to make the urns, jars and any borrowed architecture sit inside that same world of grime, moss and age.
1. Establish the statues as your reference. The bundle's statues come with their assigned materials and 2K PBR maps (metallic, normal and roughness), so treat their level of weathering as the target everything else must match — not the other way around.
2. Pull the brightest, cleanest props down to match. A freshly placed Azure Gargoyle Urn or a Ritual Jar can read too crisp next to centuries-old marble. Nudge roughness up slightly and desaturate the base tone on the mismatched material instance so the funerary props look as if they have weathered alongside the graves.
3. Unify with a shared grime layer where you can. If you are comfortable with material instances, expose a simple dirt or moss parameter and drive it from the same value across the statue, urn and jar materials so a single slider ages the whole scene together. This keeps the look coherent without re-authoring each texture by hand.
4. Let vertical surfaces tell the weather story. Marble streaks downward where rain runs off; moss gathers in shadowed crevices and at the base. Bias your added grime toward the lower thirds and the recessed details of each statue rather than dusting everything evenly, and the marble will read as genuinely outdoor-aged.
5. Keep texel density consistent. All four packs use 2048x2048 PBR textures, which is a gift — it means a statue, an urn and a jar standing side by side share roughly the same detail resolution, so nothing looks suspiciously sharper or softer than its neighbour at the same camera distance.
Step 4 — Build the mood with fog, moonlight and shadow
Geometry sets the stage; light makes it gothic. A graveyard scene lives or dies on atmosphere, and the good news is that the assets are already lit-correct — Nanite meshes with proper PBR materials respond honestly to whatever lighting you give them, so your effort goes entirely into the mood pass.
1. Set a low, cold key light. Add or rotate the 'Directional Light' to sit just above the horizon and tint it toward cold blue-white to read as moonlight. A shallow angle throws long statue shadows across the path, which is exactly the drama a graveyard wants.
2. Add height fog for depth. Drop in an 'Exponential Height Fog' actor and keep the density low but present, so distant rows of graves fade into haze and the focal tombs nearest the player stand out by contrast. Layered depth is what separates a flat field of props from a place with a far side you want to explore.
3. Pool darkness, then carve it back. Keep ambient light low and let the moonlight do the carving, so the recesses of the Tormented statues fall into genuine shadow. The drama comes from contrast — bright marble edges against deep black hollows — not from flooding the scene with fill.
4. Use the urn and jars as accent-light excuses. A faint glow from inside the Azure Gargoyle Urn or a ritual jar cluster gives you a motivated warm point of light to break up the cold blue palette and to draw the eye to your altar arrangement.
5. Walk the path in-editor to check the read. Pilot the player camera down your primary route and confirm the focal tombs land where you want the eye to go, that the fog reveals depth without swallowing the scene, and that no statue's automatic collision is blocking the route awkwardly. Adjust spacing and rotation until the walk feels authored.
Putting it together and where to go next
The workflow is deliberately layered: block the layout, mix the silhouette families, tone-match the materials, then light for mood. Built in that order, a believable gothic graveyard is mostly a set-dressing exercise rather than a technical one, because the Fantasy Statue Bundle's Nanite meshes, automatic collision and ready-assigned 2K materials remove almost all of the per-asset setup work.
To start, open the FantasyStatueBundle project in Unreal Engine 5.6, or migrate its content into your own project via right-click then Asset Actions then Migrate, and begin dragging SM_NatureStatue and SM_TormentedStatue meshes into your level. Pair them with the free Azure Gargoyle Urn for instant funerary accents, fold in Ritual Jars for altar and shrine clusters, and reach for the Dark Fantasy Props Bundle when you need to dress the surrounding crypts and architecture in one pass. From there, the scene is yours to age, light and explore.
What each pack brings to the graveyard
| Pack | What it adds | Meshes | Engine | Price (USD) |
|---|---|---|---|---|
| Fantasy Statue Bundle | 18 weathered marble statues (Nature + Tormented) + table | 19 static meshes | UE 5.6 | 7.99 |
| The Azure Gargoyle Urn | Single ornate funerary urn accent | 1 static mesh | UE5 | Free |
| Ritual Jars | 9 canopic-style ritual jars + altar table | 10 static meshes | UE 5.7 | 7.99 |
| Dark Fantasy Props Bundle | 100+ gothic props for crypts and architecture | ~105 static meshes | UE 5.6 | 34.99 |
Verified counts and engine versions from each product's listing. Use this to decide what to layer in.
FAQ
How do I make a graveyard cemetery scene in Unreal Engine for a fantasy world?
Work in layers: block out a primary path with rows of graves and a couple of tall focal tombs, drop in statues from the Fantasy Statue Bundle (and free urns and ritual jars to vary the silhouettes), tone-match the weathered marble across every prop, then light it with low cold moonlight and exponential height fog. The statues are Nanite meshes with automatic collision and 2K PBR materials, so most of the work is set dressing rather than technical setup.
Do I need to set up collision or LODs for the statues?
No. The Fantasy Statue Bundle statues ship as Nanite static meshes with automatic collision and their materials already assigned, so you can walk around them immediately and you do not author manual LODs for the high-detail marble.
Which engine version should I build the scene in?
The Fantasy Statue Bundle and the Dark Fantasy Props Bundle are authored for Unreal Engine 5.6, while Ritual Jars targets Unreal Engine 5.7. If you plan to combine all of them, building in 5.7 is the safest choice, since opening the 5.7 jars in an older engine may trigger an upgrade prompt. The free Azure Gargoyle Urn is listed for generic UE5.
How do I stop the graveyard looking like one repeated asset kit?
Interleave silhouette families. Mix the Nature and Tormented statue series, add the free Azure Gargoyle Urn at focal points, cluster Ritual Jars into altars, and pull the surrounding architecture from the Dark Fantasy Props Bundle. Then vary rotation, spacing and slight tilt per statue so the layout reads as settled over time rather than placed in a grid.
Can I scatter the same statues across a large open world cheaply?
Yes. For repeated landmark placement across a large area, add a statue to an Instanced Static Mesh component or a Foliage type and paint them in. Combined with Nanite, this keeps a sprawling graveyard cheap to render and easy to re-seed.
Fantasy Statue Bundle
Eighteen dark-fantasy statues and plinths — Nanite meshes with automatic collision and 72 textures at 2048². Gothic, weathered and game-ready for open-world set dressing.