tutorial · 2026-01-29
How to Import a Heightmap as a Landscape in Unreal Engine 5 (Step by Step)
Turn a grayscale heightmap file into a real, sculptable UE5 landscape using the Manage tab's Create From File workflow.
What you are actually importing
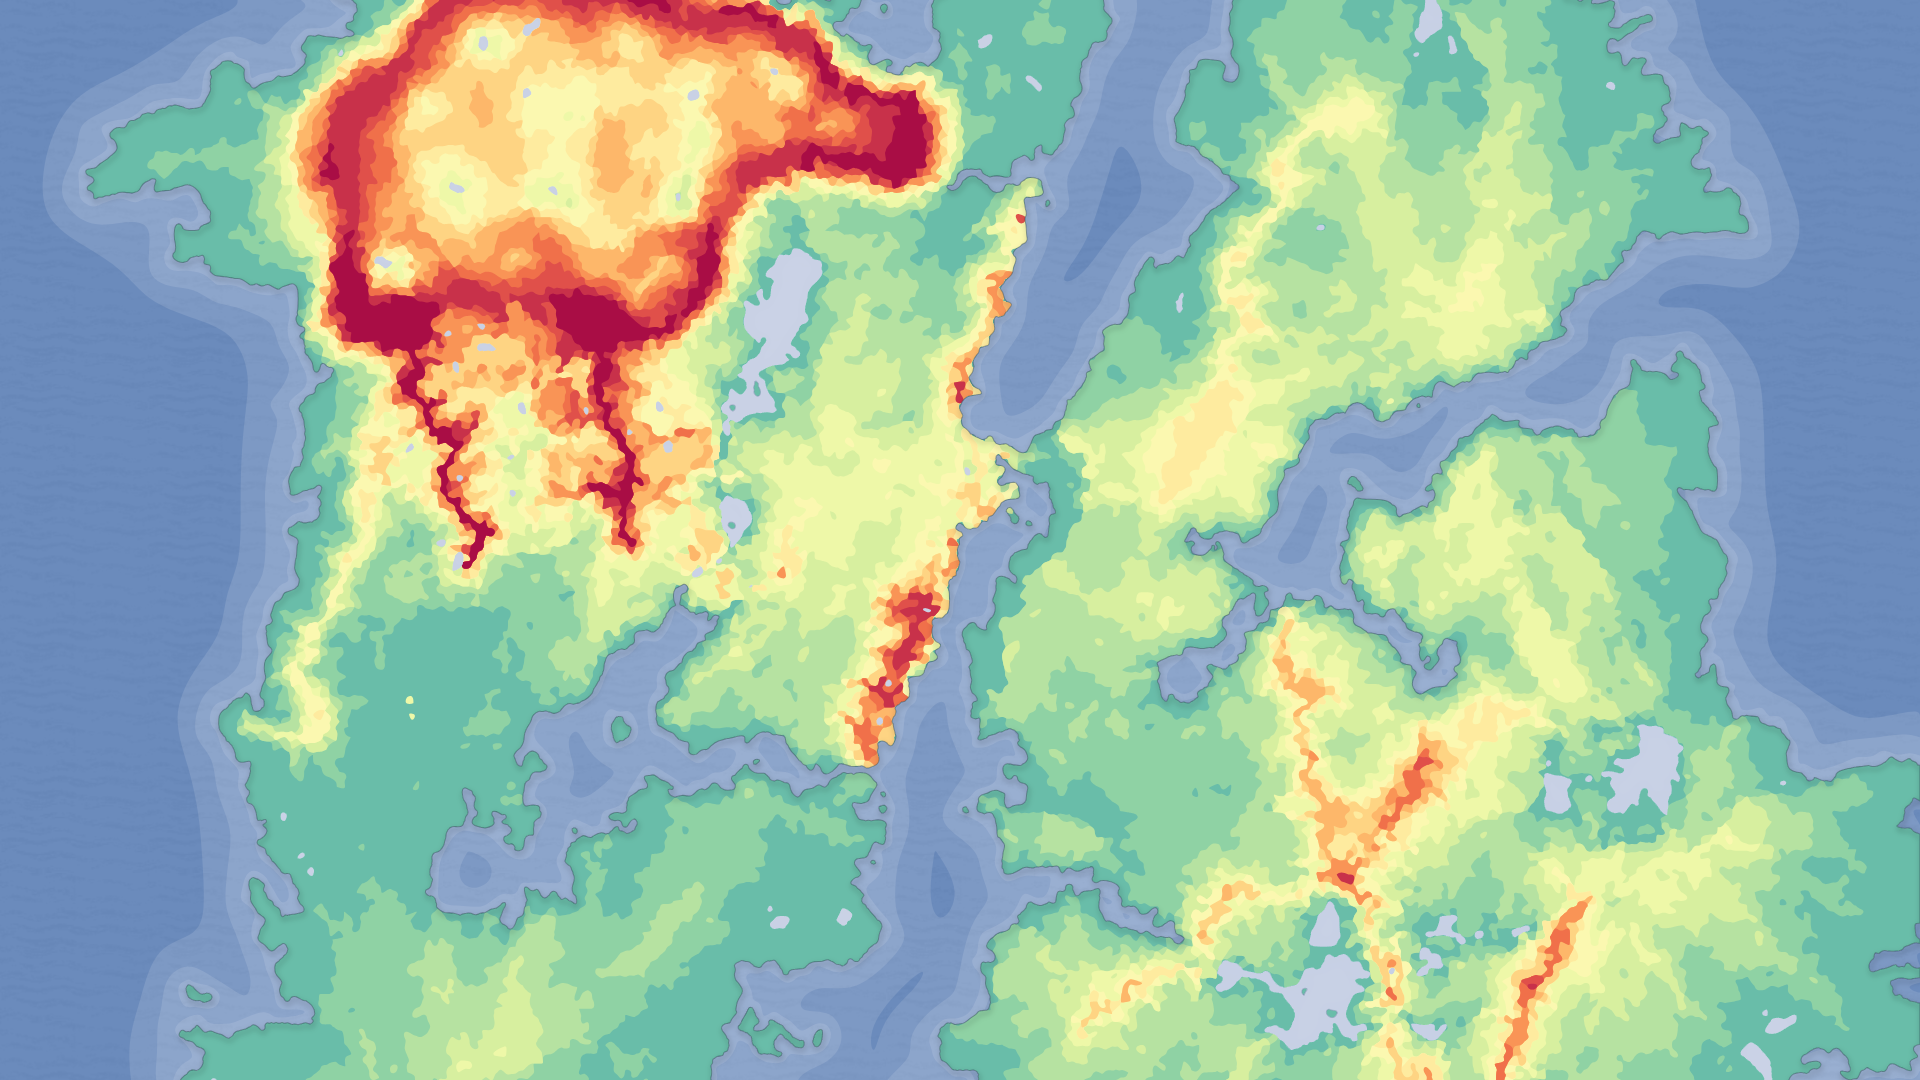
If you have searched for how to import a heightmap and create a landscape from a file in Unreal Engine, the part that trips most people up is not the menu - it is the file itself. A heightmap is not a picture of your terrain. It is a single-channel grayscale image where each pixel's brightness encodes elevation: pure white is the highest ground, pure black is the lowest, and every grey in between is a height somewhere on that scale. Unreal reads those values and pushes the landscape vertices up or down to match.
Because elevation needs fine gradation, you want a 16-bit grayscale image rather than an 8-bit one. An 8-bit map only has 256 possible height values, which produces visible stair-stepping or terracing on long slopes; a 16-bit map gives you 65,536 steps and reads as smooth terrain. The heightmaps in the Massive Open World Landscape Pack are supplied as 16-bit grayscale PNGs precisely so the imported terrain comes in clean.
Keep one mental model throughout this tutorial: the brighter the pixel, the higher the ground. Once that clicks, everything in the import dialog makes sense.
Step 1 to 4: Create a new landscape from your heightmap file
1. Open the level you want to build in, then switch to the Landscape tool. From the main toolbar choose the mode dropdown and select 'Landscape'. The Landscape panel appears on the left.
2. In the Landscape panel, make sure you are on the 'Manage' tab and that the 'New Landscape' section is showing. Change the radio option from 'Create New' to 'Import from File'. This is the 'create from file' path you came here for - it tells Unreal to build the landscape's geometry from an image rather than starting flat.
3. Next to the 'Heightmap File' field, click the browse button and select your grayscale heightmap. For the Massive Open World Landscape Pack, point this at one of the supplied 16-bit grayscale PNGs for the map you want, at the resolution you have chosen. Unreal reads the image dimensions and pre-fills the section and component counts to match.
4. Leave the location, rotation and scale at their defaults for a first pass, then click 'Import' at the bottom of the panel. Unreal generates the landscape actor in your level with the elevation taken straight from the image.
Picking a resolution: 512, 1K, 2K, 4K or 8K
The Massive Open World Landscape Pack ships every one of its 14 open-world landscapes as heightmaps at four sizes - labelled 1K, 2K, 4K and 8K - so you can match the resolution to the job rather than always importing the biggest file. Unreal's import dialog also lets you work with smaller maps such as 512 when you only need a focused area.
Choose a smaller map (512 or 1K) when the terrain is one tile of a larger world, a sub-region, a test bed, or a level where the player never sees the whole continent. Smaller heightmaps import faster and are lighter to iterate on while you are still blocking things out.
Reach for 4K or 8K when you are building a genuinely large, explore-the-continent style world and you need elevation detail to hold up at distance. The 8K maps are intended for the biggest open worlds. If you are assembling something larger still, you can import several smaller landscapes and patch them together using World Partition, which is one of the supported workflows for this pack.
There is no single 'correct' resolution - it is a trade-off between terrain detail, import time and runtime cost. Start smaller while you iterate on layout, then re-import at a higher resolution once the design is locked.
Why exact sizes like 1009 and 2017 matter
The friendly labels are approximate. The actual pixel dimensions shipped in the Massive Open World Landscape Pack are 1009x1009 for 1K, 2017x2017 for 2K, 4033x4033 for 4K and 8129x8129 for 8K. Those are not round powers of two, and that is deliberate.
Unreal builds a landscape from components, and each component is made of a whole number of quads. The cleanest landscape grids fall on dimensions of the form (a number of components) multiplied by (a component size) plus one - which lands on values like 1009, 2017, 4033 and 8129 rather than 1024, 2048, 4096 or 8192. Heightmaps authored at these landscape-friendly sizes import without forcing Unreal to resample or pad the image, so you avoid an extra interpolation pass and the subtle artefacts it can introduce.
The practical takeaway: when you supply your own heightmaps, prefer these landscape-friendly dimensions, and when you import the pack's maps, do not 'fix' the odd numbers - they are already the sizes Unreal wants. The included PDF guide covers heightmap import alongside the AutoMaterial setup if you want the canonical reference.
Verifying the imported terrain
After import, the first check is the silhouette. Drop a camera back and confirm the high ground really is high and the basins really are low - the bright areas of your heightmap should be the peaks. If your terrain looks inverted, you have most likely loaded an image whose brightness convention is flipped; the pack's maps follow the standard whiter-is-higher rule.
Second, sanity-check the scale. Fly a character or a default mannequin onto the landscape and walk a slope. If mountains feel like speed bumps or like sheer unclimbable walls, adjust the Z scale on the landscape actor's transform rather than re-importing - the heightmap encodes relative height, and the transform's vertical scale maps that range to world units.
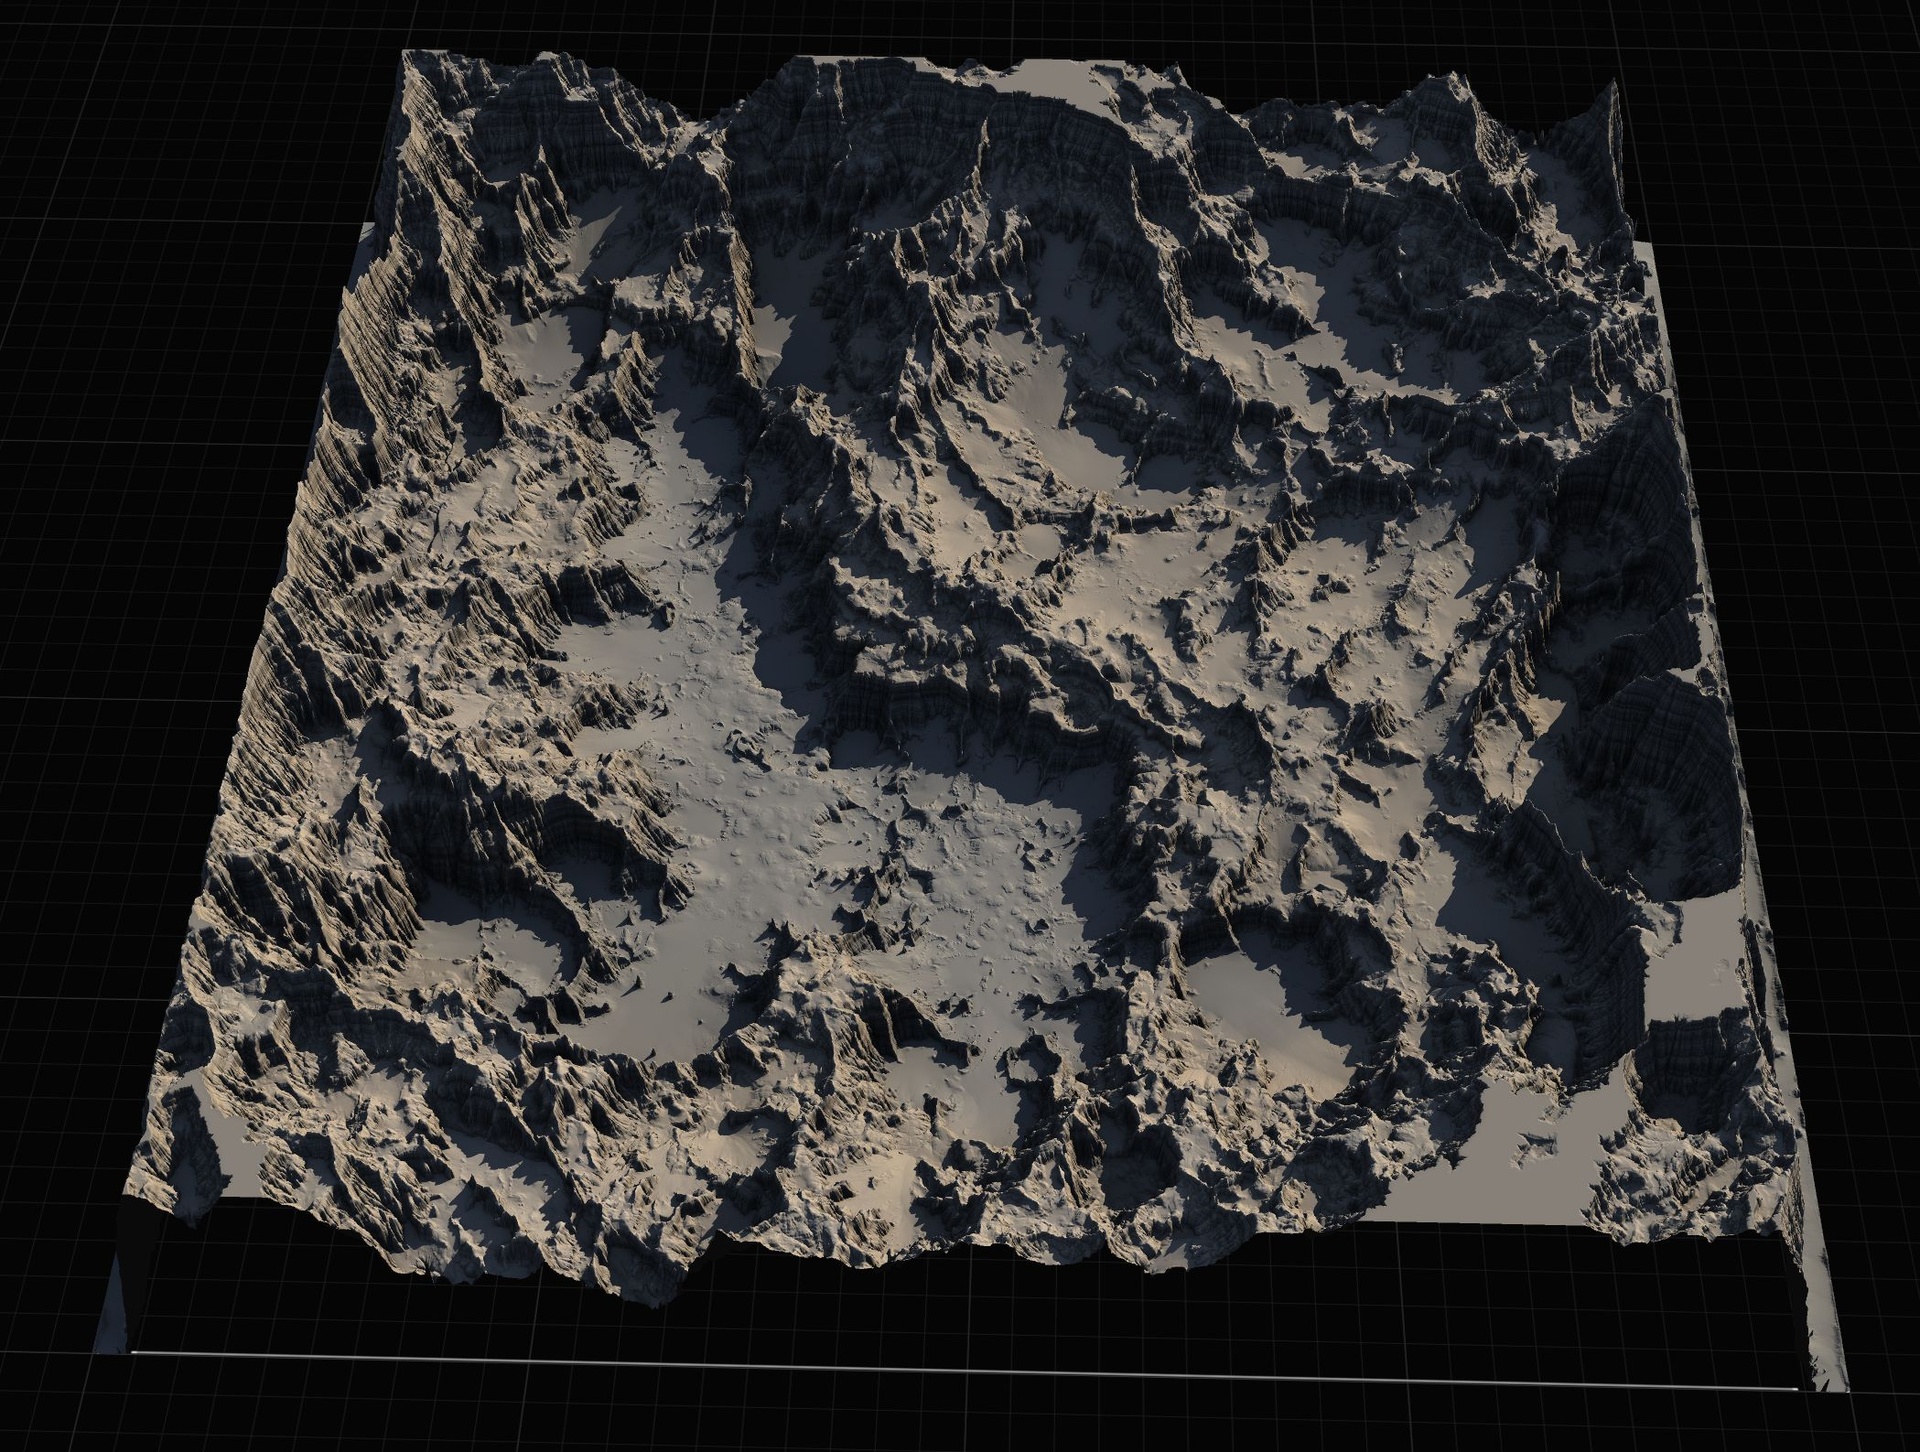
Third, look for seams or flat clipping at the extremes. Clean 16-bit source like the pack's heightmaps should show smooth gradients with no terracing; visible banding usually means an 8-bit or over-compressed source somewhere upstream.
Finally, expect the landscape to render black or untextured at this stage - that is normal. Importing the heightmap only builds the geometry. To get the auto-painted look, assign the pack's AutoMaterial (an included landscape material that paints by height and slope) into the landscape's material slot, then use the Paint tab to 'Create Layers from Assigned Material' and fill the base layer. From there you can swap in your own textures on the five custom layers.
Where the pack saves you time
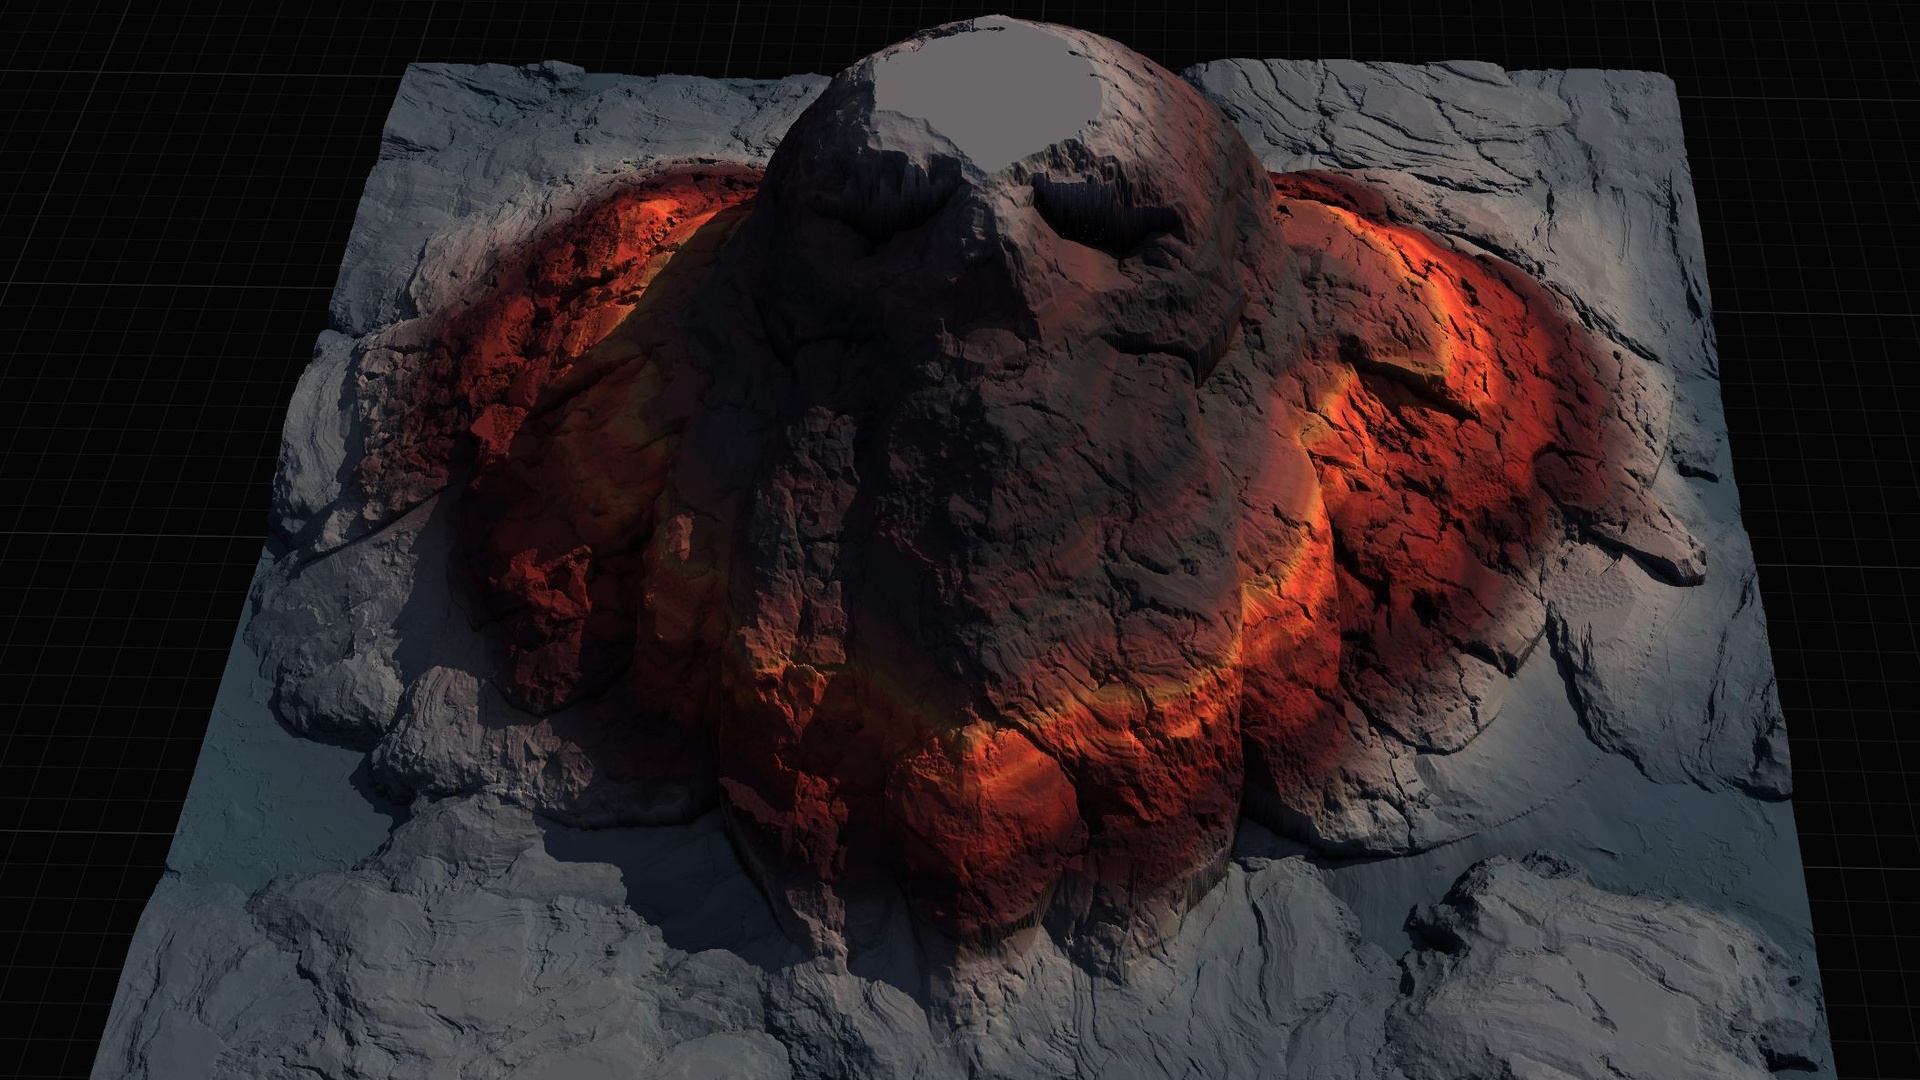
You can build heightmaps by hand, but a ready-made library gets you to a textured, lit world far faster. The Massive Open World Landscape Pack provides 14 distinct open-world landscapes - islands, highlands, mountain passes and volcanic terrain among them - each at 1K through 8K, which is 56 heightmaps in total across the 14 maps and four sizes.
Beyond the raw heightmaps, every map ships a demo level that is already textured and lit, with oceans applied where appropriate via the Water plugin, plus a Gaea source file so you can re-edit the terrain shape before re-importing. The AutoMaterial does the height-and-slope painting for you - snow on the peaks, cliffs on the steep faces, ground in the valleys - and leaves five extra layers free for your own art. The demo project association is Unreal Engine 5.7, while the heightmaps themselves are engine-version-agnostic image files you can import into any landscape-capable UE5 project.
The fastest route to a finished world: import the right-resolution heightmap, assign the AutoMaterial, fill the base layer, then iterate on the material instance and the five custom layers with your own textures.
Heightmap resolutions in the Massive Open World Landscape Pack
| Label | Exact pixel size | Typical use |
|---|---|---|
| 1K | 1009 x 1009 | Sub-regions, single tiles, fast iteration |
| 2K | 2017 x 2017 | Focused levels and mid-size areas |
| 4K | 4033 x 4033 | Large worlds needing distance detail |
| 8K | 8129 x 8129 | Full explore-the-continent open worlds |
Labels are approximate; the exact pixel sizes are landscape-friendly dimensions, not powers of two. All maps are 16-bit grayscale PNG.
FAQ
How do I import a heightmap and create a landscape from a file in Unreal Engine 5?
Open the Landscape tool, go to the Manage tab's New Landscape section, switch from 'Create New' to 'Import from File', browse to your 16-bit grayscale heightmap, then click Import. Unreal builds the landscape geometry from the image, with brighter pixels becoming higher ground.
Why are the heightmaps 1009 and 2017 pixels instead of 1024 and 2048?
Unreal landscapes are built from components of whole quads, and the cleanest grids land on (components x component size) + 1 - values like 1009, 2017, 4033 and 8129. Authoring at these landscape-friendly sizes lets the image import without resampling, avoiding interpolation artefacts. Do not round them to powers of two.
What bit depth should my heightmap be?
Use 16-bit grayscale. An 8-bit image only has 256 height steps and causes visible terracing on slopes; 16-bit gives 65,536 steps for smooth terrain. The Massive Open World Landscape Pack ships its heightmaps as 16-bit grayscale PNGs for this reason.
My imported landscape is black. Did the import fail?
No - a black or untextured landscape after import is expected, because importing only builds the geometry. Assign the included AutoMaterial to the landscape's material slot, then in the Paint tab use 'Create Layers from Assigned Material' and fill the base layer to paint the terrain by height and slope.
Can I combine several heightmaps into one big world?
Yes. Import smaller heightmaps as separate landscapes and patch them together using World Partition. This lets you use 1K or 2K maps as individual tiles while reserving the 8K maps for the largest single landscapes.
Massive Open World Landscape Pack
Fourteen ready-to-play open-world landscapes with an auto-material setup — 56 heightmaps from 1K to 8K, including volcanic islands and oceans. Drop in, paint your own textures and build your world.