article · 2026-03-31
How to Make Weathered Marble Stone Material in Unreal Engine 5
Practical material tips for reading, dirtying and tinting weathered marble statue maps so a whole set of gothic props feels carved from the same quarry.
The problem: stone that reads like plastic
If you have dropped a marble statue into a UE5 level and it looks like wet plastic rather than centuries-old carved rock, you are not alone. Weathered stone is one of the hardest surfaces to sell in Unreal Engine 5, because the eye expects subtle dirt accumulation, micro-roughness in the polished faces and a believable break between clean marble and the grime that gathers in crevices. Get any of those wrong and the whole prop looks brand new and synthetic.
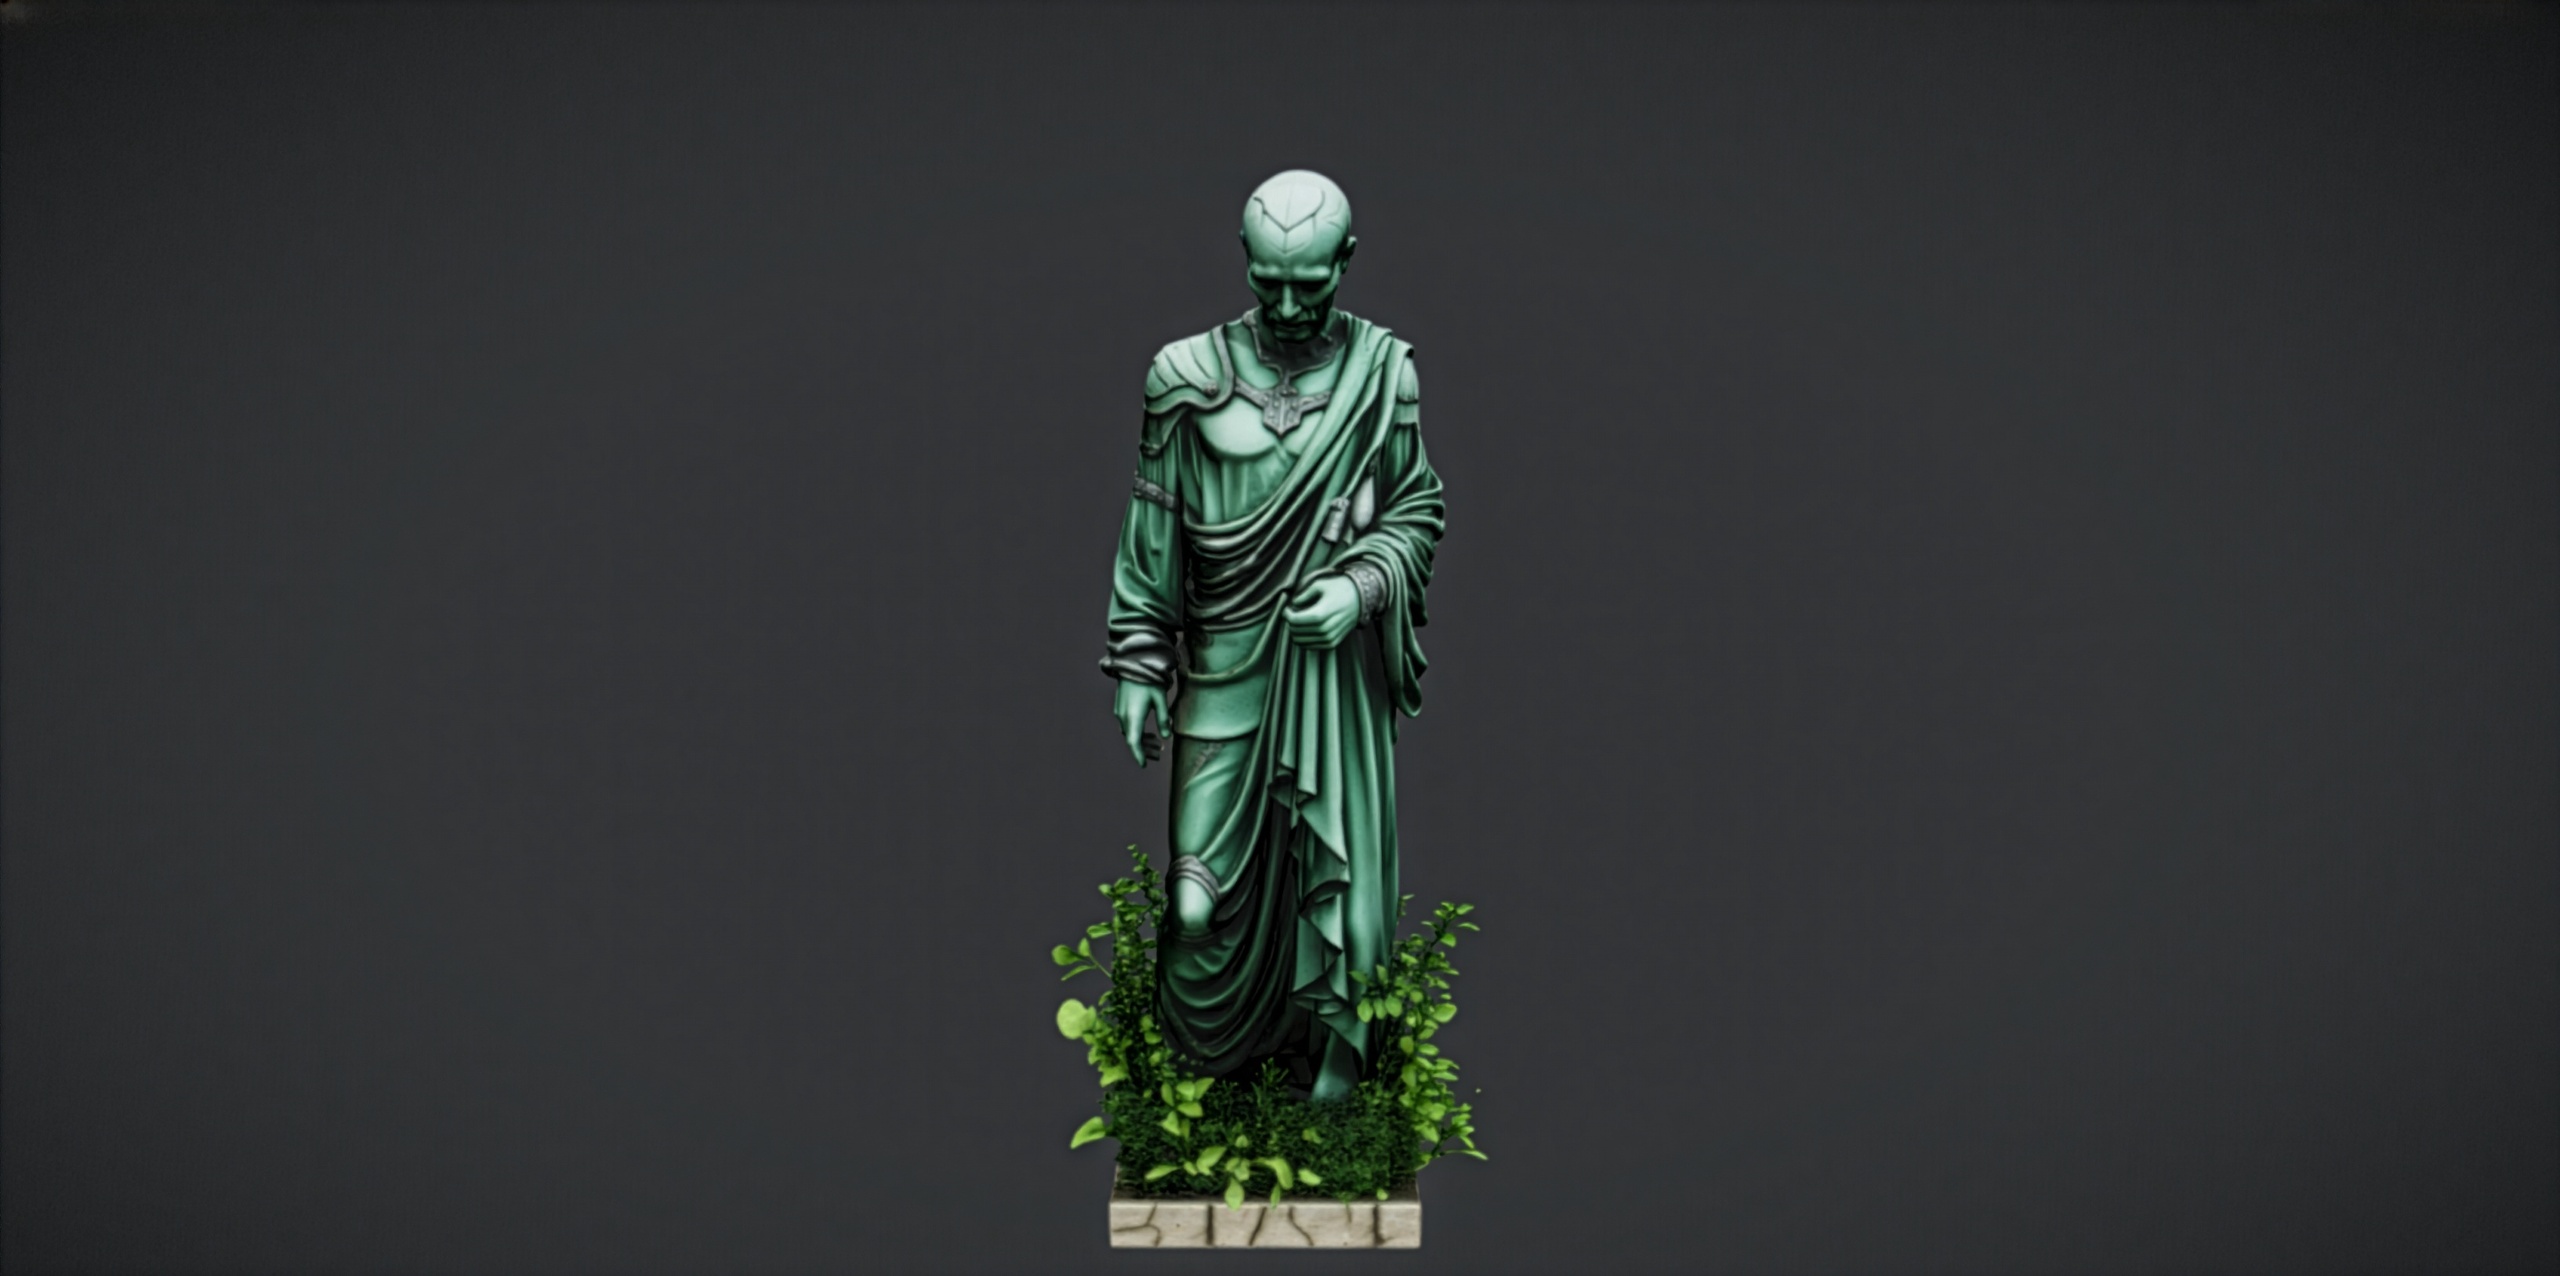
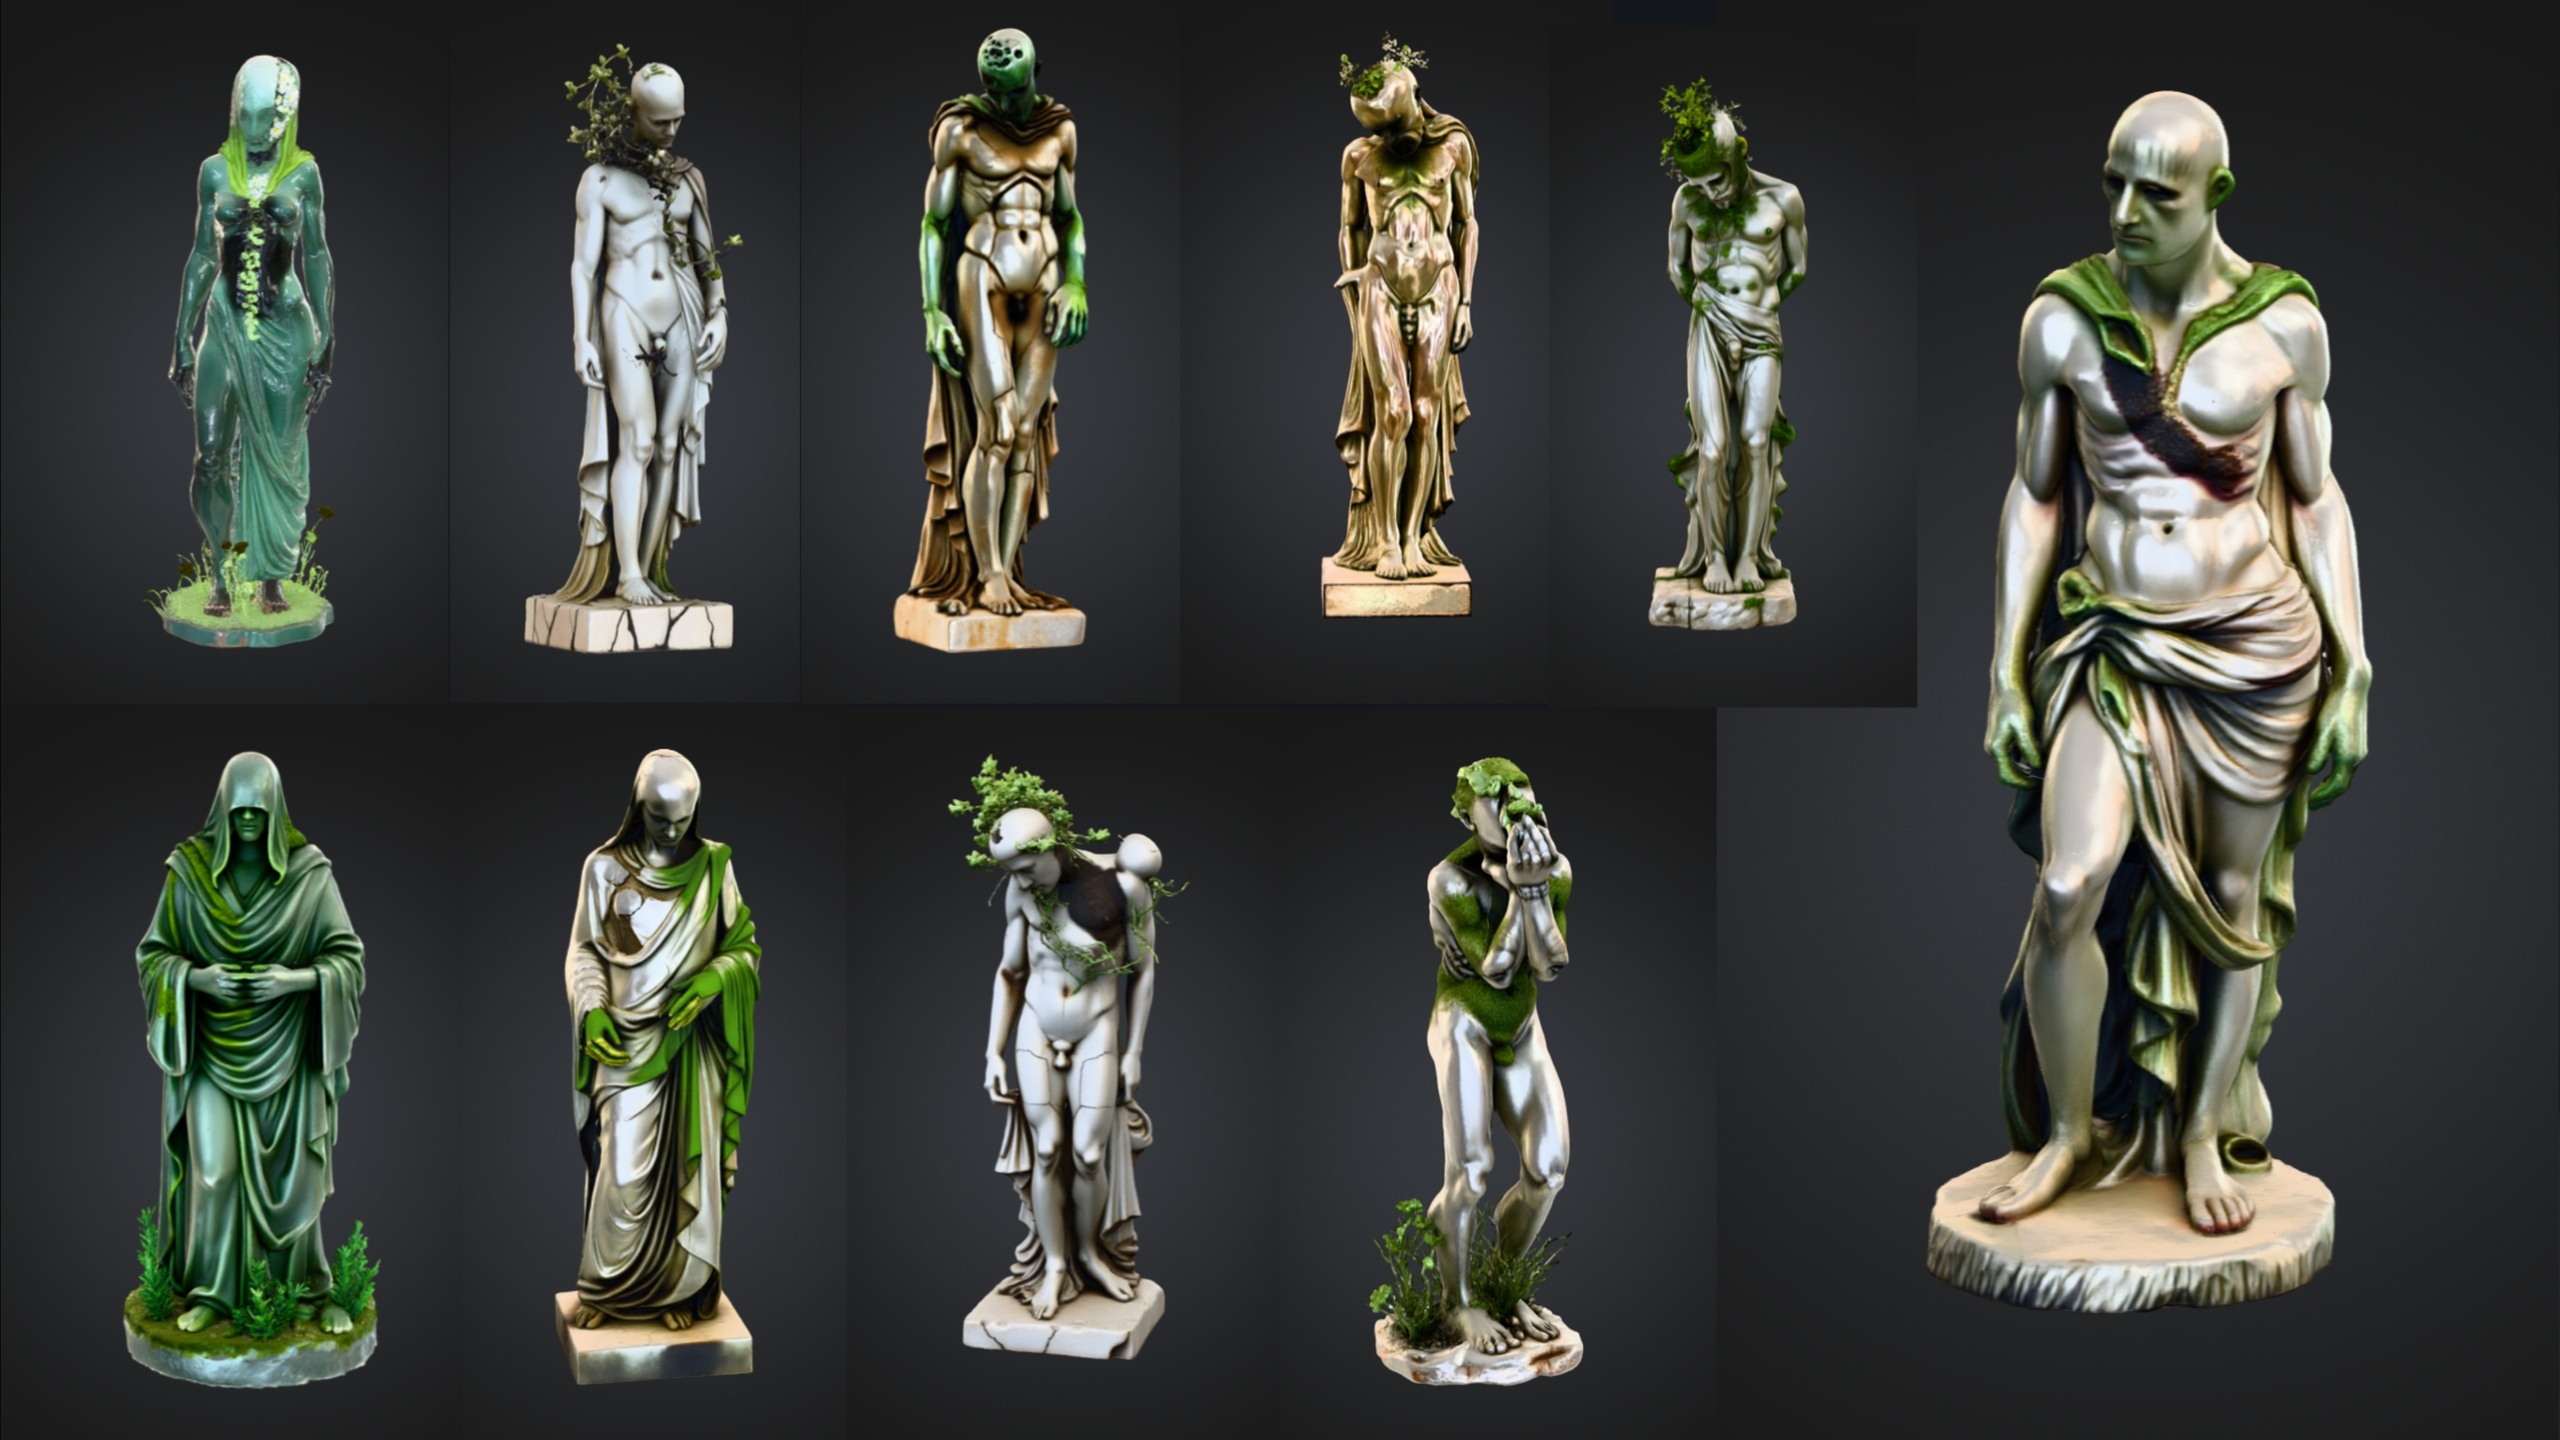
This guide covers how to make a weathered marble stone material in Unreal Engine 5 that holds up close, and how to keep a whole set of statues feeling like they came from the same quarry. The worked example uses the Fantasy Statue Bundle, a dark-fantasy set of 18 weathered marble statues delivered as Nanite static meshes, because each piece ships with its own 2K PBR maps that we can read, overlay and tint without starting from a blank material.
Reading the statue PBR maps
Before you touch a node, understand what you have. Each statue in the Fantasy Statue Bundle ships with a 2048x2048 PBR set: base colour, plus metallic, normal and roughness maps. Marble is a dielectric, so the metallic map should sit at or near black across the whole surface. If you find any white in it, that is almost always an authoring artefact rather than real metal, and it is the first thing to check when stone looks unnaturally shiny.
Open the assigned material and trace the texture samples to their slots. The base colour feeds Base Color, the normal feeds Normal, and the roughness feeds Roughness. Confirm the normal map is flagged as a normal map in its texture asset settings so its compression is correct, otherwise the carved detail in the stone will read flat and the lighting will sit wrong on the surface.
Sample the base colour at a few points with the colour picker. Real weathered marble is rarely pure white; it carries warm or cool greys and faint veining. Knowing the existing tonal range tells you how much room you have to push moss, grime and tint later without crushing the carved detail the artist baked into the maps.
Adding moss and grime overlays
The fastest way to age clean marble is to layer dirt where water and time would deposit it: the recesses, the underside of overhangs and the flat upward faces where moss takes hold. Rather than painting this by hand, drive it procedurally so it works across every statue in the set.
1. In the statue's material, add a 'WorldAlignedBlend' node. Feed its output into a 'Lerp' (LinearInterpolate) that sits between your base marble and a darker grime colour, so dirt favours the upward-facing surfaces where it would naturally settle.
2. Bring in a tiling grunge or moss texture and a 'TextureCoordinate' node to control its tiling. Multiply this against the grime contribution so the dirt has organic break-up instead of a flat wash.
3. Use the blue channel of the statue's own normal map, or a 'Fresnel' node, as an extra mask so the overlay concentrates in cavities and edges rather than coating the polished high points evenly.
4. Expose the overlay strength as a scalar parameter and convert the material to a Material Instance. That lets you dial moss per statue from the instance without recompiling the parent graph, which matters when you are dressing a whole graveyard.
Tinting for consistency across props
A set looks expensive when every piece reads as the same material under the same light. The Fantasy Statue Bundle is split into a nine-piece Nature series and a nine-piece Tormented Souls series, so the simplest way to unify them is a shared tint applied through one master material instanced across all of them.
Add a vector parameter, call it something like Tint, and multiply it against the base colour before it reaches Base Color. Default it to white so it is neutral, then nudge it cool for a damp graveyard or warm for a sun-bleached shrine. Because every statue is a Material Instance of the same parent, changing the tint once and propagating it keeps the whole set coherent.
If you also pull in the free Fantasy Nature Statue as a centrepiece, or mix in gothic set dressing from the Dark Fantasy Props Bundle, expose the same Tint parameter on those materials too. Matching the tint vector across separately authored props is what stops a mixed scene from looking like assets bought from three different stores.
Roughness for a believable stone read
Roughness is what finally sells stone over plastic. Weathered marble is not uniformly matte or uniformly polished: the exposed, rain-washed faces stay smoother while the sheltered, dirt-caked recesses go rougher and duller. Drive that variation from the same masks you built for the grime overlay.
Take the statue's supplied roughness map and 'Lerp' between it and a higher roughness value using your moss and cavity mask as the alpha. Where grime accumulates, push roughness up so those areas catch no specular highlight; where the marble stays clean, let the original map keep a tighter, more polished response. Expose the rough and clean roughness endpoints as scalar parameters so you can tune the contrast per environment.
Finally, lean on the maps you already paid for. Every statue is Nanite with automatic collision and its own 2K metallic, normal and roughness set, so a light grime, tint and roughness layer on top of that is usually all you need. Start with the free Fantasy Nature Statue to test your master material, then apply the same parent to the full bundle and tune each statue from its instance. That is the whole pipeline: read the maps, overlay, tint, and tune roughness until the stone looks like it has stood there for centuries.
FAQ
How do I make a weathered marble stone material in Unreal Engine 5 without authoring textures from scratch?
Start from a set that already ships PBR maps, then layer on top. The Fantasy Statue Bundle statues come with 2K base colour, metallic, normal and roughness maps, so you only need to add a procedural moss and grime overlay, a tint parameter and a roughness blend in the material graph rather than painting every map yourself.
Why does my marble look like plastic in UE5?
Usually two causes. Check that the metallic map reads black, because marble is a dielectric and any metallic value gives it an unnatural sheen. Then add roughness variation: a single flat roughness value reads as plastic, whereas blending rougher grime into the recesses and keeping cleaner faces smoother gives a convincing stone read.
How do I keep a whole set of statues looking consistent?
Build one master material with exposed Tint and overlay-strength parameters, then make every statue a Material Instance of it. Changing the shared tint vector and propagating it keeps all 18 statues, across both the Nature and Tormented Souls series, reading as the same stone under the same light.
Do I need to set up LODs or collision for these statues?
No. The Fantasy Statue Bundle statues are Nanite static meshes with automatic collision, so you can drag one into the level and walk around it immediately. Because they are Nanite, you do not author manual LODs; your effort goes into the material rather than mesh optimisation.
Can I test the look before buying the full bundle?
Yes. The free Fantasy Nature Statue is a single drop-in UE5 marble statue from the same art family, so you can prototype your master material and weathering setup on it first, then apply the same parent material to the full bundle.
Fantasy Statue Bundle
Eighteen dark-fantasy statues and plinths — Nanite meshes with automatic collision and 72 textures at 2048². Gothic, weathered and game-ready for open-world set dressing.